
The Taylor Road Project
Chesapeake, Virginia
I have to say, it feels good to be back. I’ve missed the sound of my own thoughts relayed by the clicking of keys from my keyboard. Maybe you’ve noticed, maybe you haven’t, but I haven’t written in several weeks and instagram posts have been few and far between. There are many reasons for this slowing of content one of the more obvious reasons is growing more and more obvious everyday, which is the newest member of Team Wayne taking root within my abdomen. First trimester welcomed me with plenty of fatigue and nausea to put me flat on my back and truly put a halt to all things social media, writing, photography, cooking, breathing and all around joy.

Little human’s doing good though and Mama has just started to feel the creative and energy juices flowing through my veins again. Specifically, I’m was feeling enough juices to gear up and write about our last house flipping sell and victory - The Taylor Road Project.
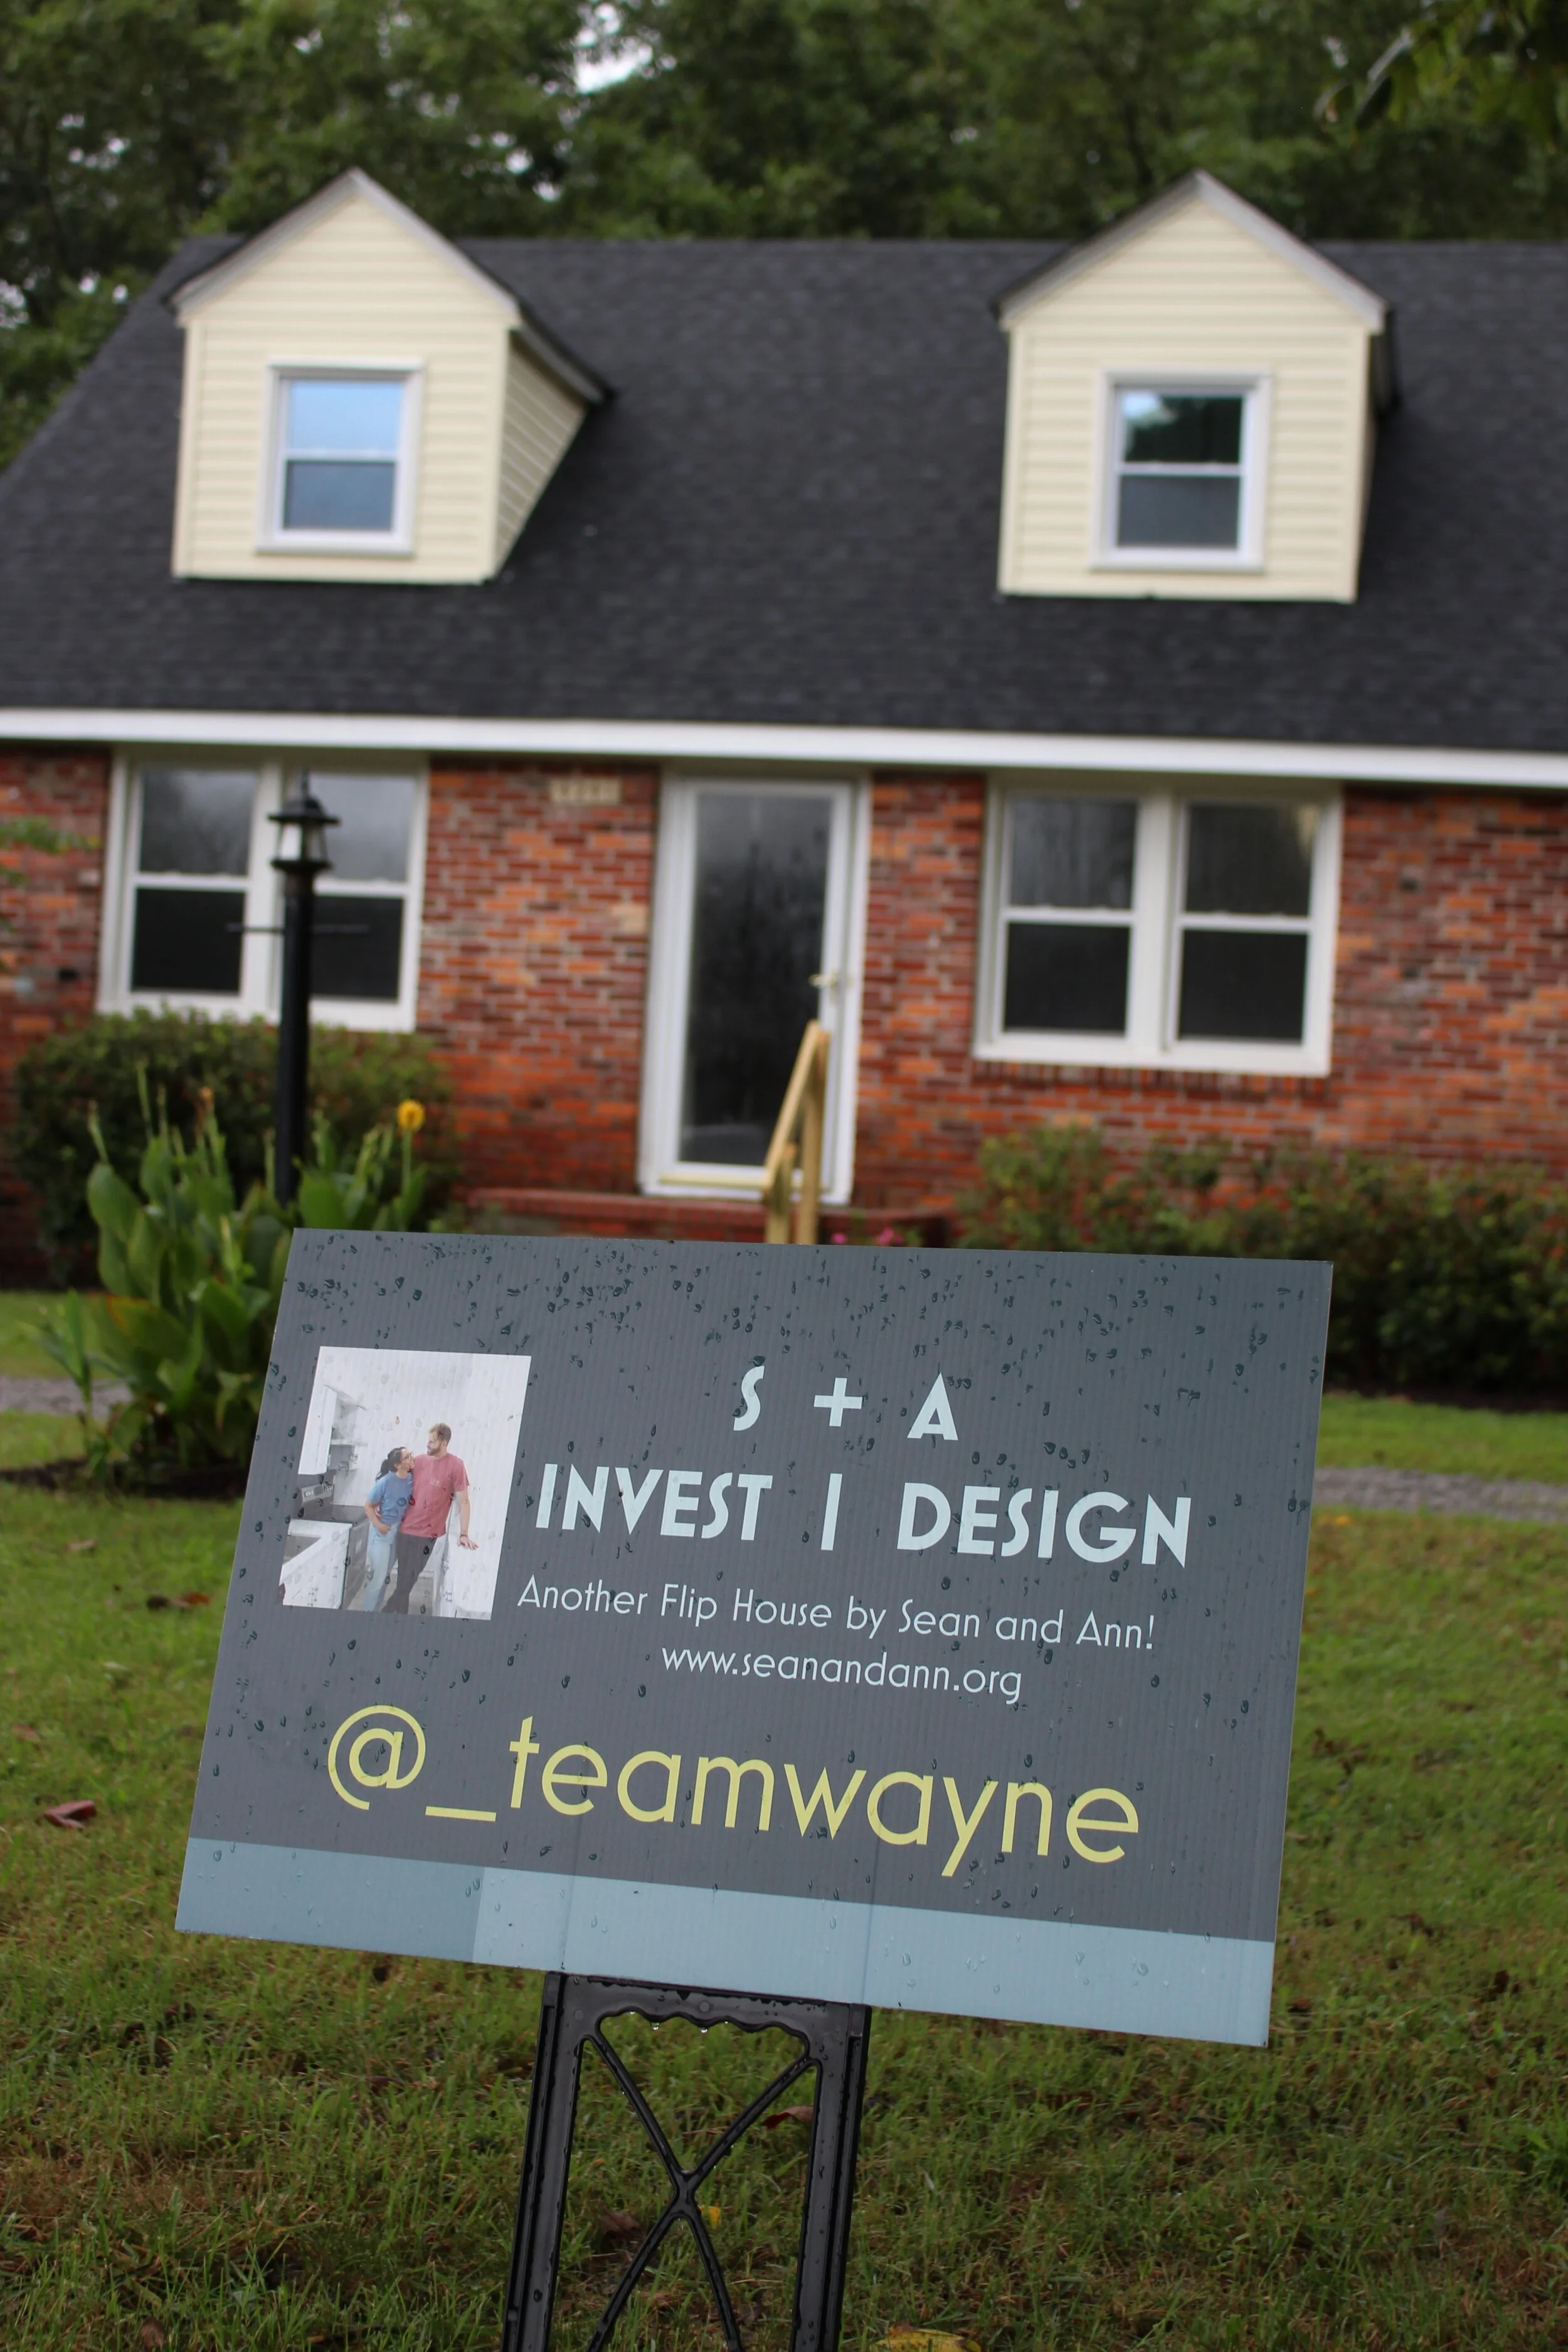
Taylor Road had plenty of ups and downs. Starting on a negative note, it was our longest house selling to date - a whopping 3 weeks! I know you’re thinking that three weeks is absolutely nothing but if you flip houses you understand that your investment money is tied up in one to two of your projects at a time. Your bank and your hard money lender want their money back pronto and every day that goes by means more and more risk to paying back what you own without massive penalties. In the broad scheme of things, it felt long at the time especially compared to our other properties that have sold in hours to single digit days, but this house was our first test of some good ol’ fashion patience.
The Kitchen

A huge victory in the home was most definitely the kitchen. We tried our hand for the very first time with hiring a professional to paint our kitchen cabinets. They were new cabinets from our cabinet people over at the Paneling Factory but we hired out the painting job. Boy are we happy we did. Bob, our painter was and IS absolutely incredible at his craft. These cabinets turned out so good, you can’t even tell they are painted by a human being!

Take it from us, after Sean and my dad repainted our kitchen cabinets ourselves in our own home, we would NEVER do it again. It is a great budget friendly way to save a buck but at the end of the day it will never be perfect. You will always be able to tell deep, deep down that it was painted. In our opinion, SAVE UP and get the factory cabinets orrrrrr hire a professional like Bob. Truly, his spraying job must have been just as steady as a robot in the cabinet painting factory.

Every detail came together the way I imagined from the gold faucet and light fixtures to the grey tiles on the kitchen floor, I couldn’t have been happier with the other all look of the space.

The white quartz countertops were pure magic and I truly want them in our future home. The stone is so durable it won’t stain, scratch, or change over time even with the white! White subway tile sported throughout the kitchen as backsplash and will continue to do so in our future projects to come.
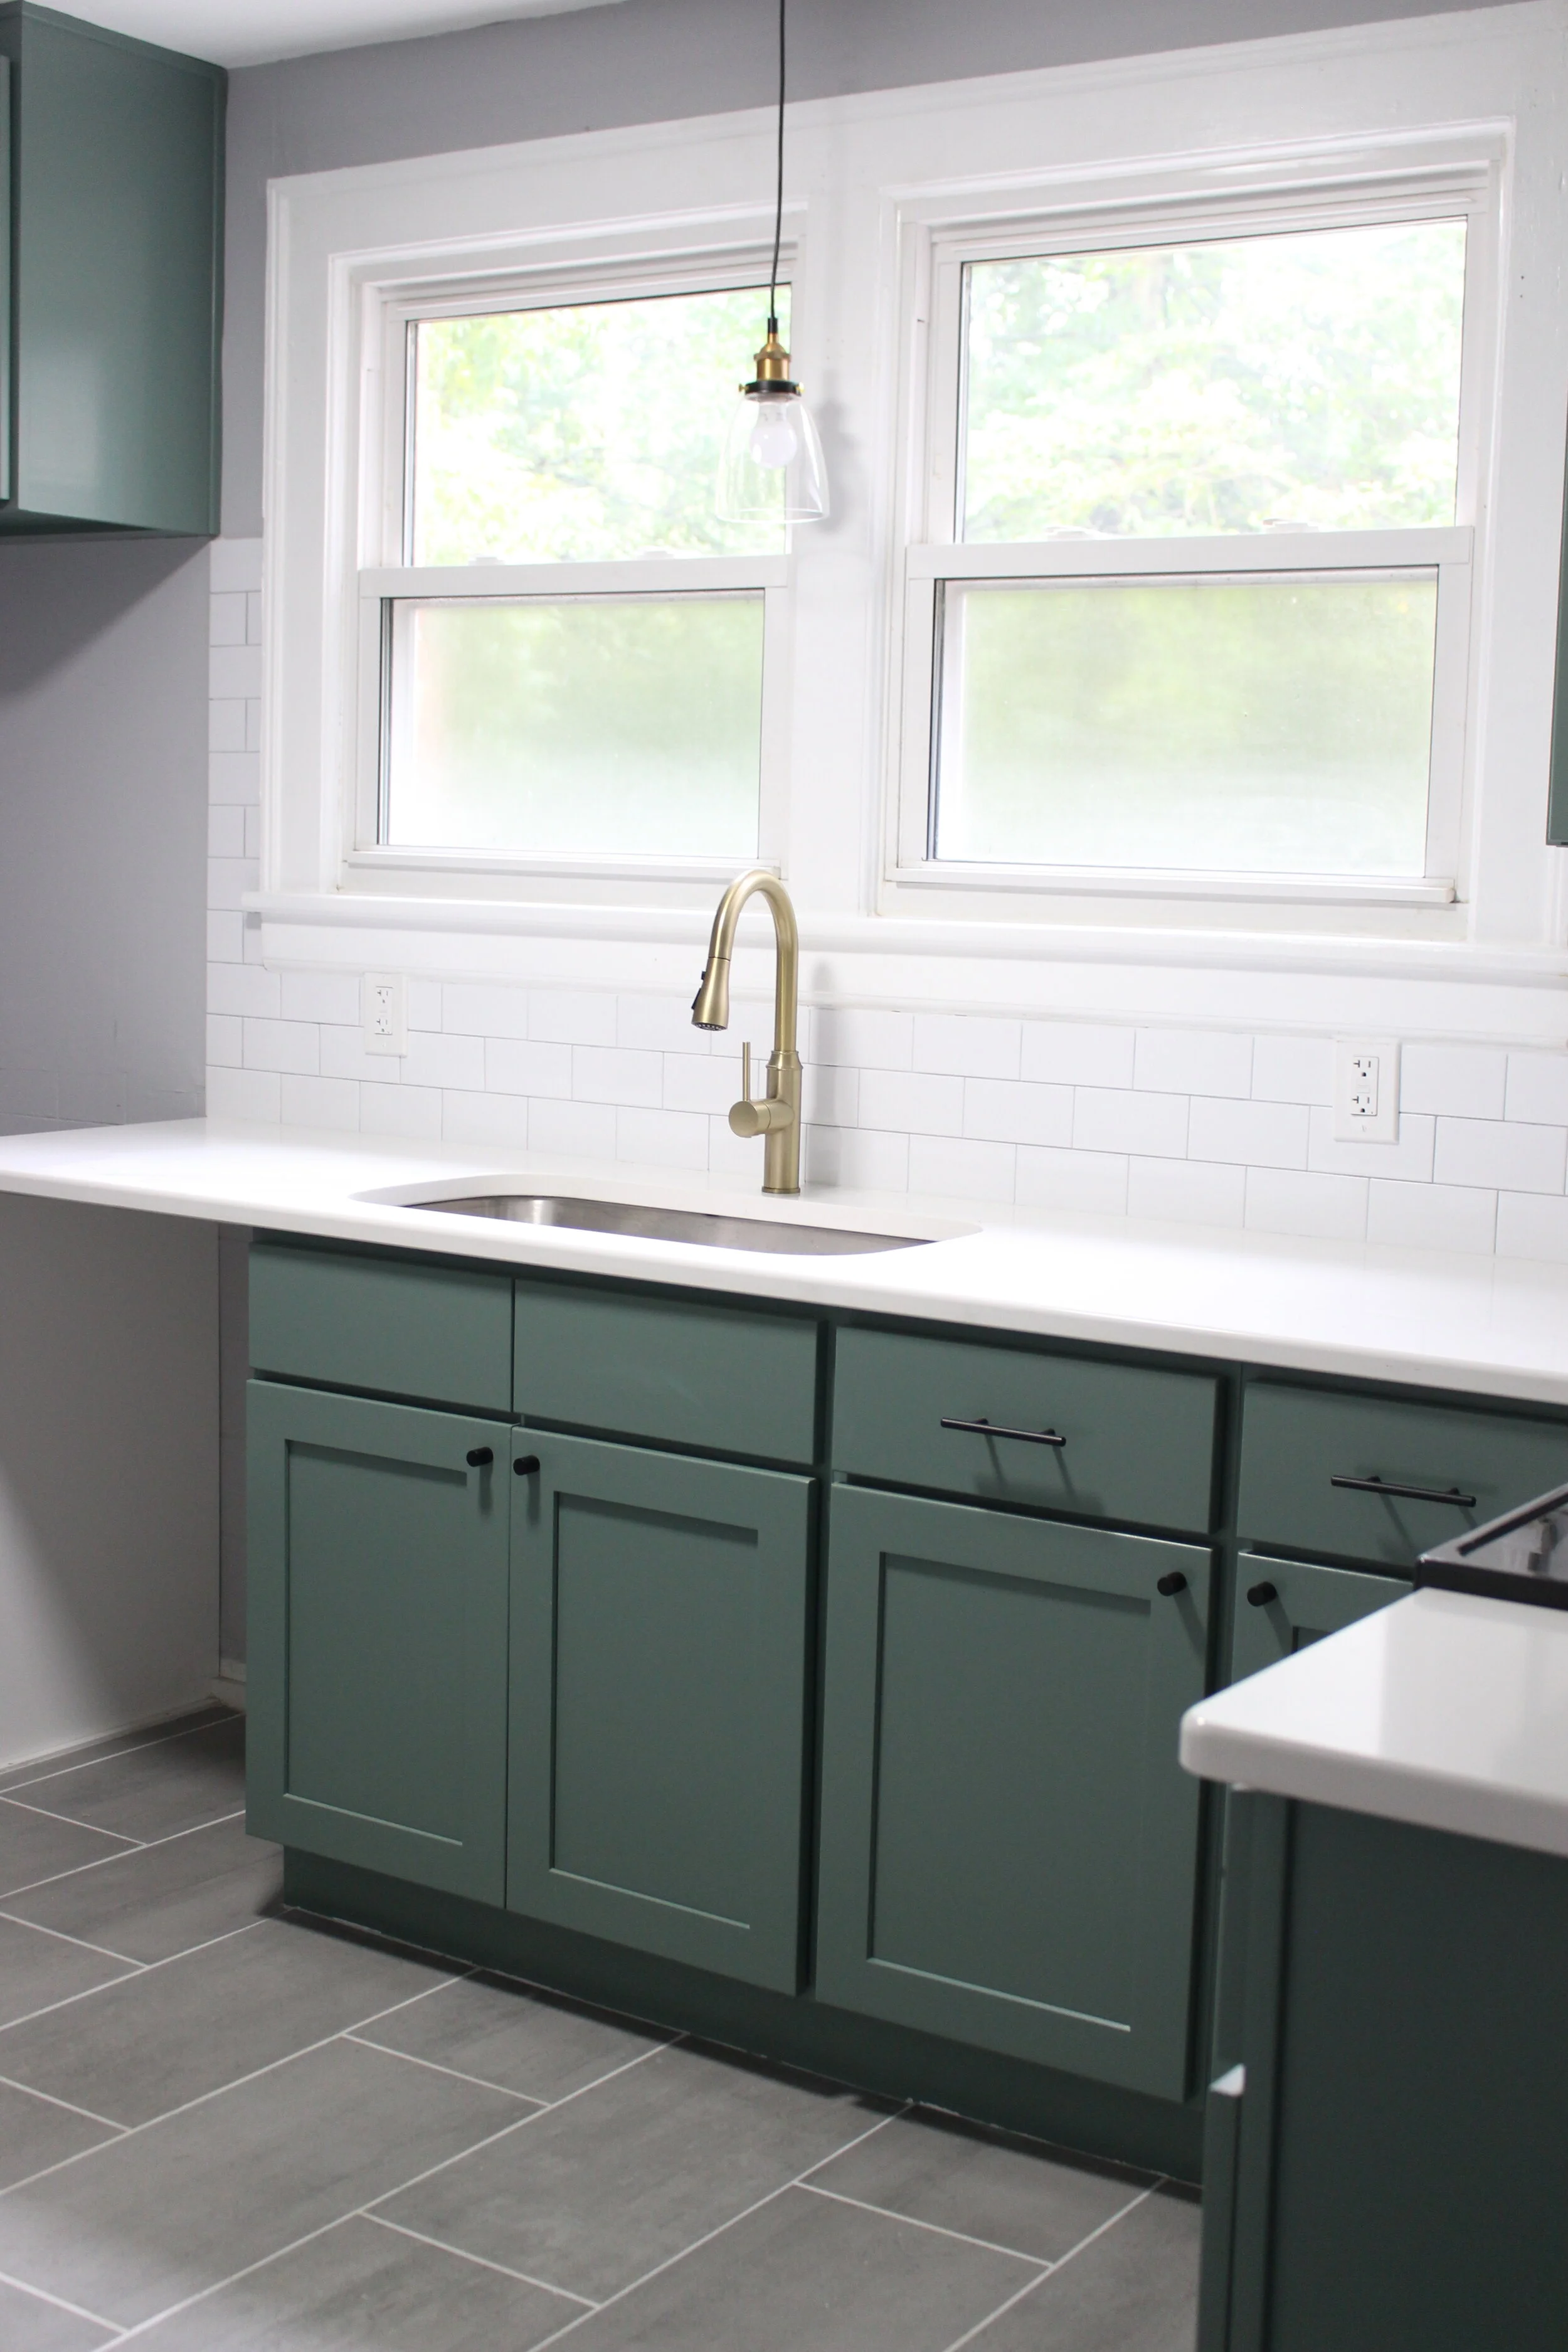
The green color we chose for the cabinets was called Taiga Spruce by Valspar Paint. It was the perfect green with just the slightest hint of blue. We loved it so much, it had to debut in the bathroom as well.
The Downstairs Bathroom
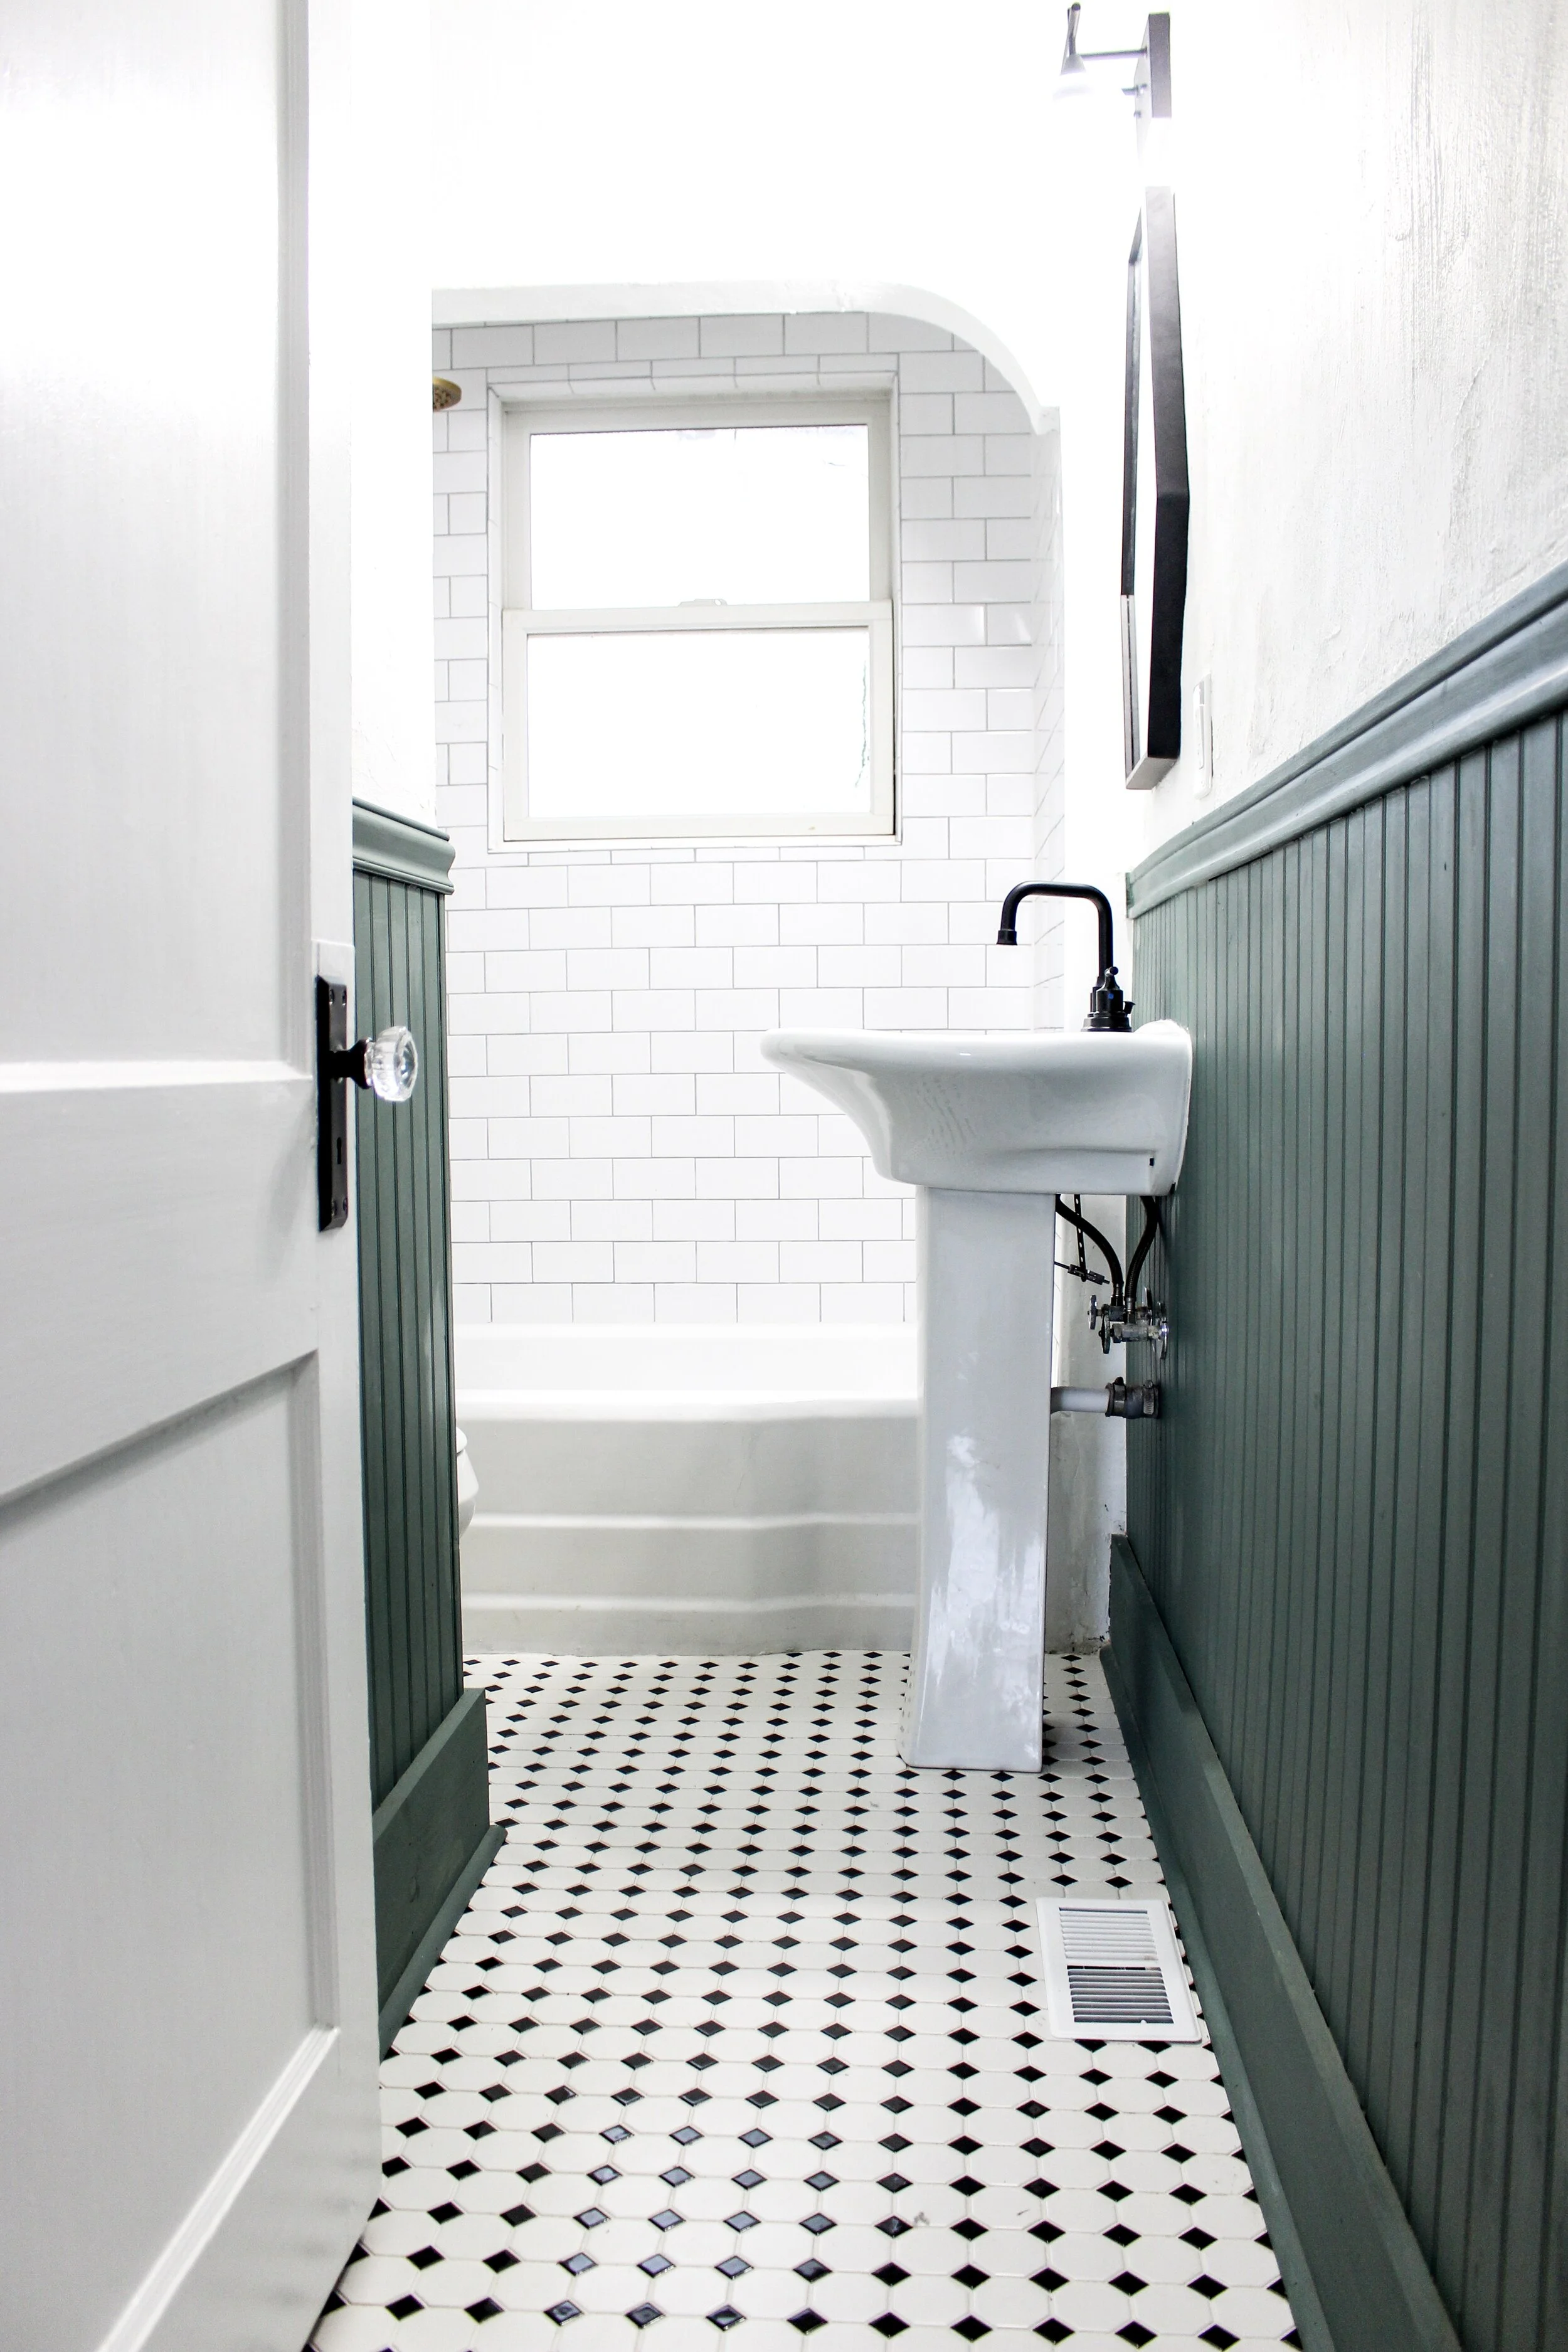
This house was a classic and vintage meets modern updates feel. I love the classic black and white diamond and octagon pattern of the floor tile. Sean and I called this the “Mama inspired bathroom floor” because my mother-in-law (Sean’s mom) has this floor in her downstairs bath!

I’ve been absolutely loving a moody wainscoting and so is the rest of the world via Pinterest and HGTV so a dark green bead board in the bathroom it was going to be. I thought the green added a modern feel to the vintage shower set we pick out from Amazon that said, “ hey look, I’m new and trendy, but we can totally live here together anyway.”
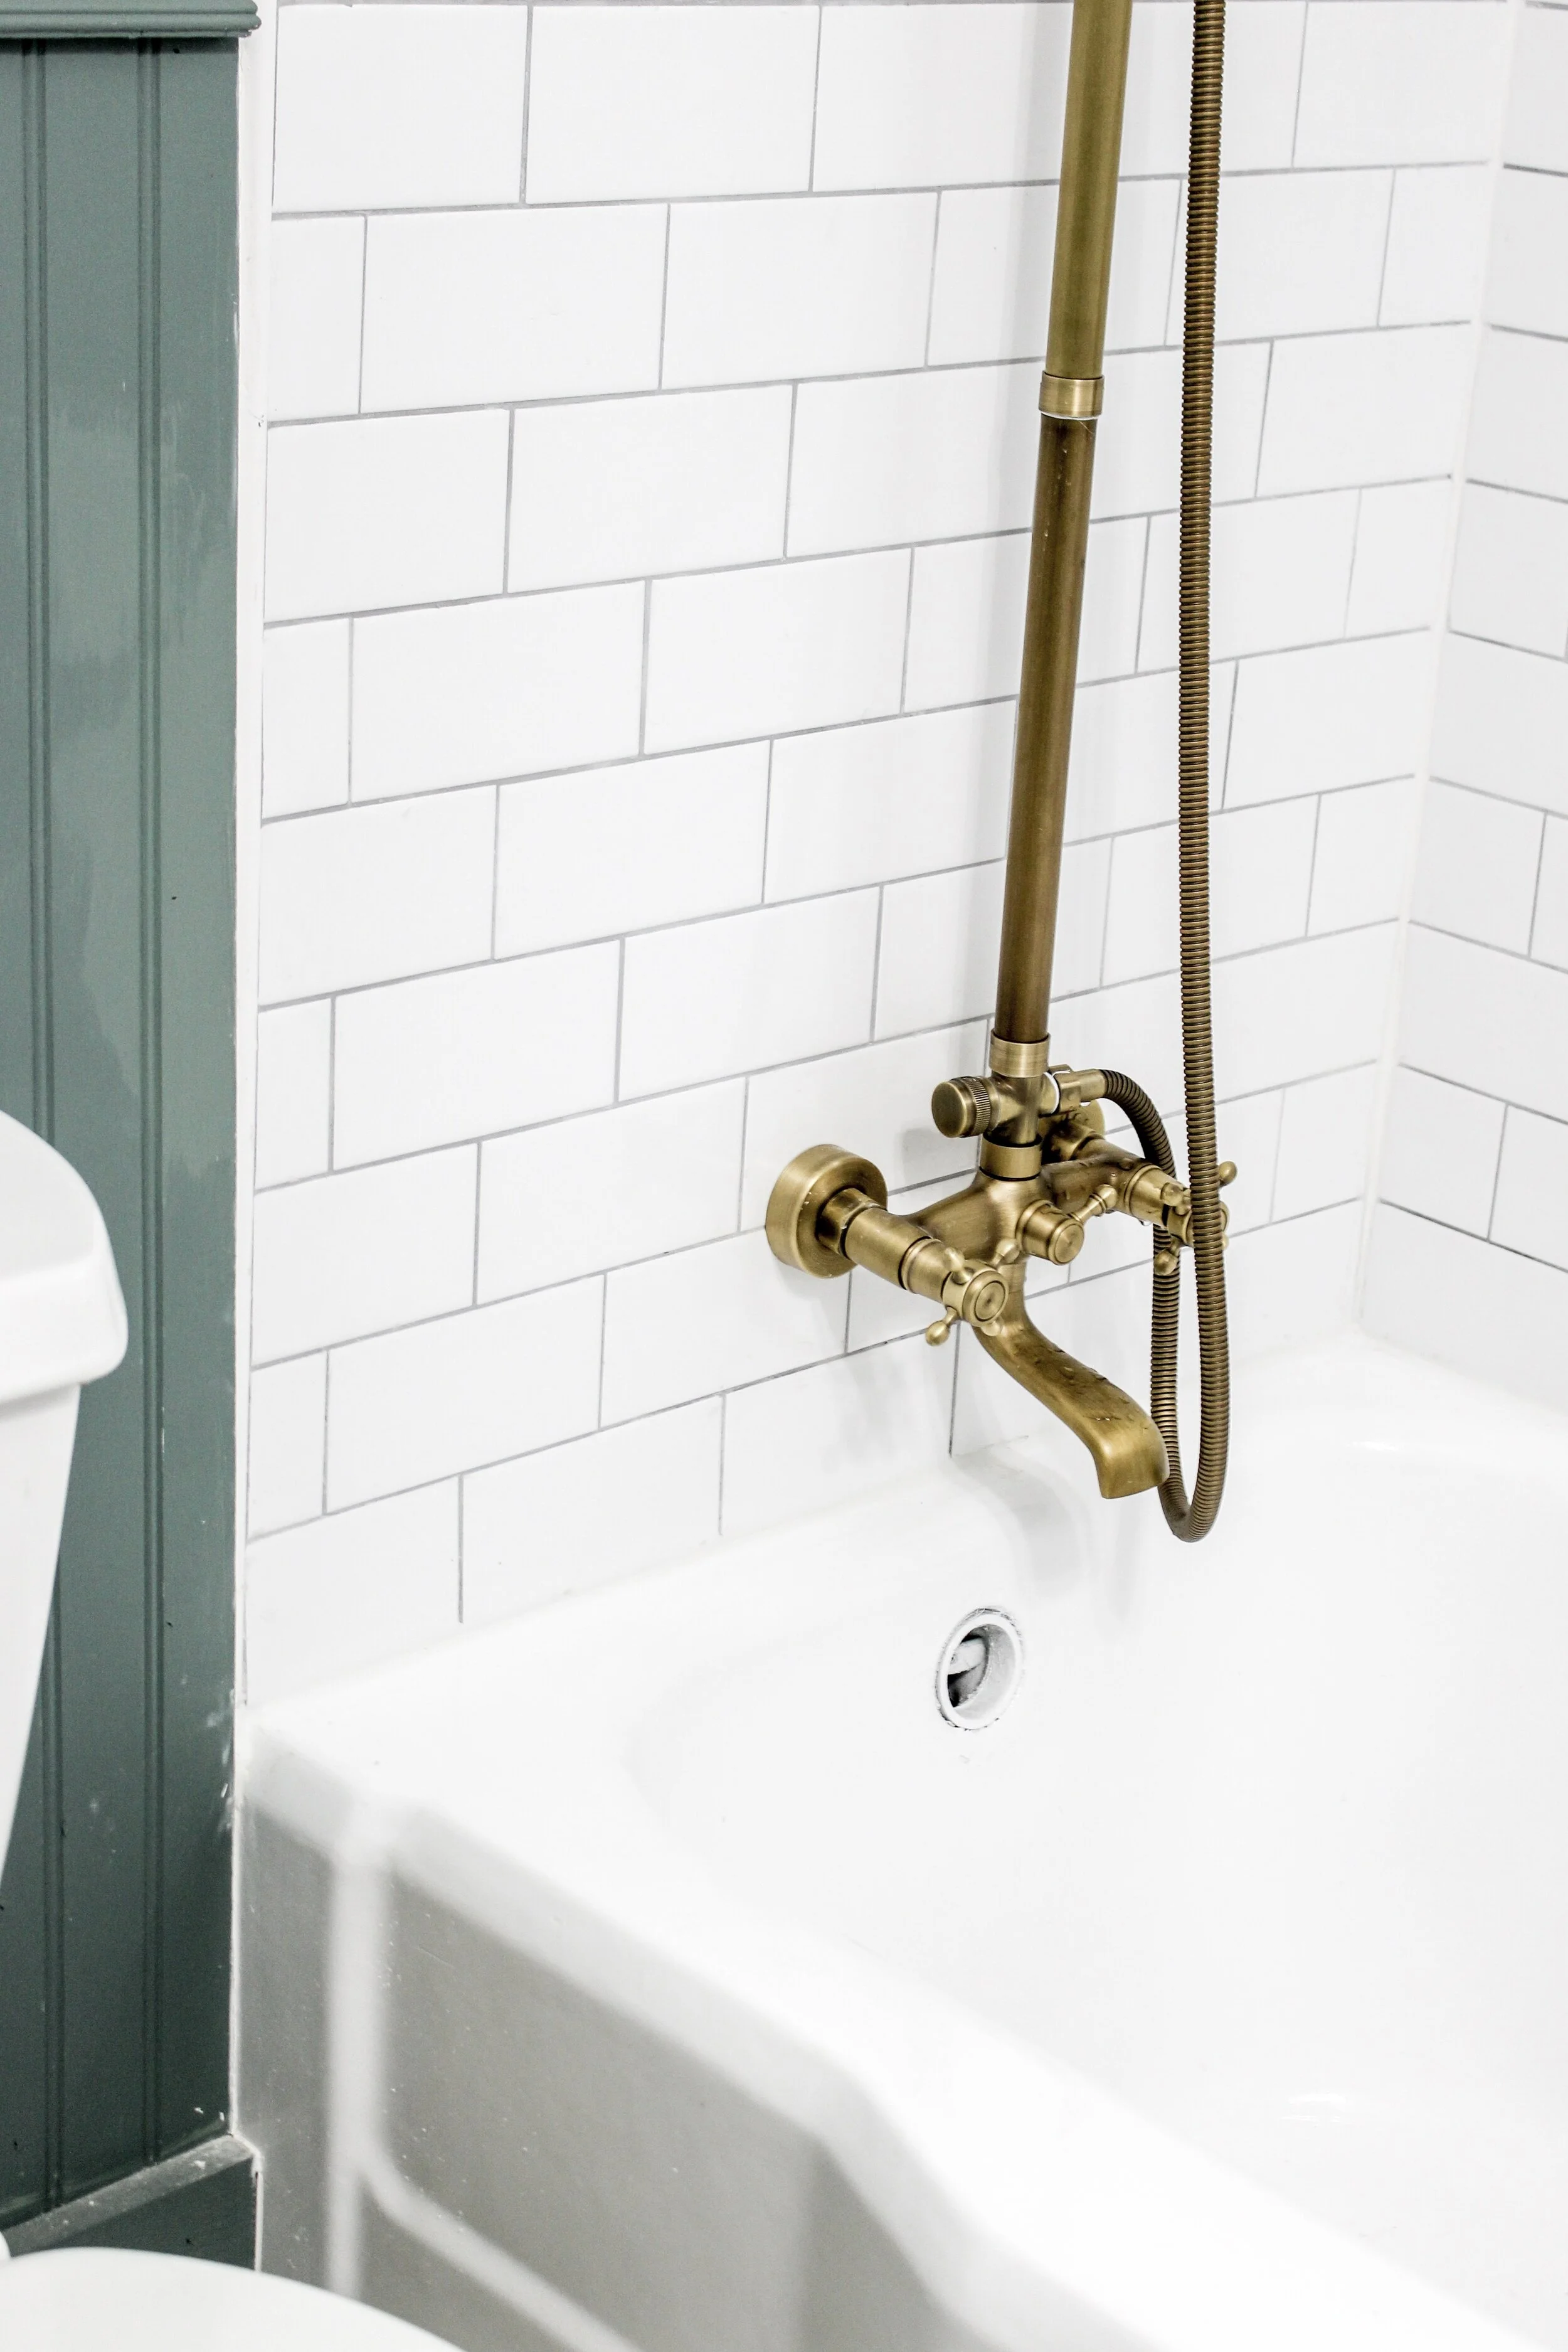
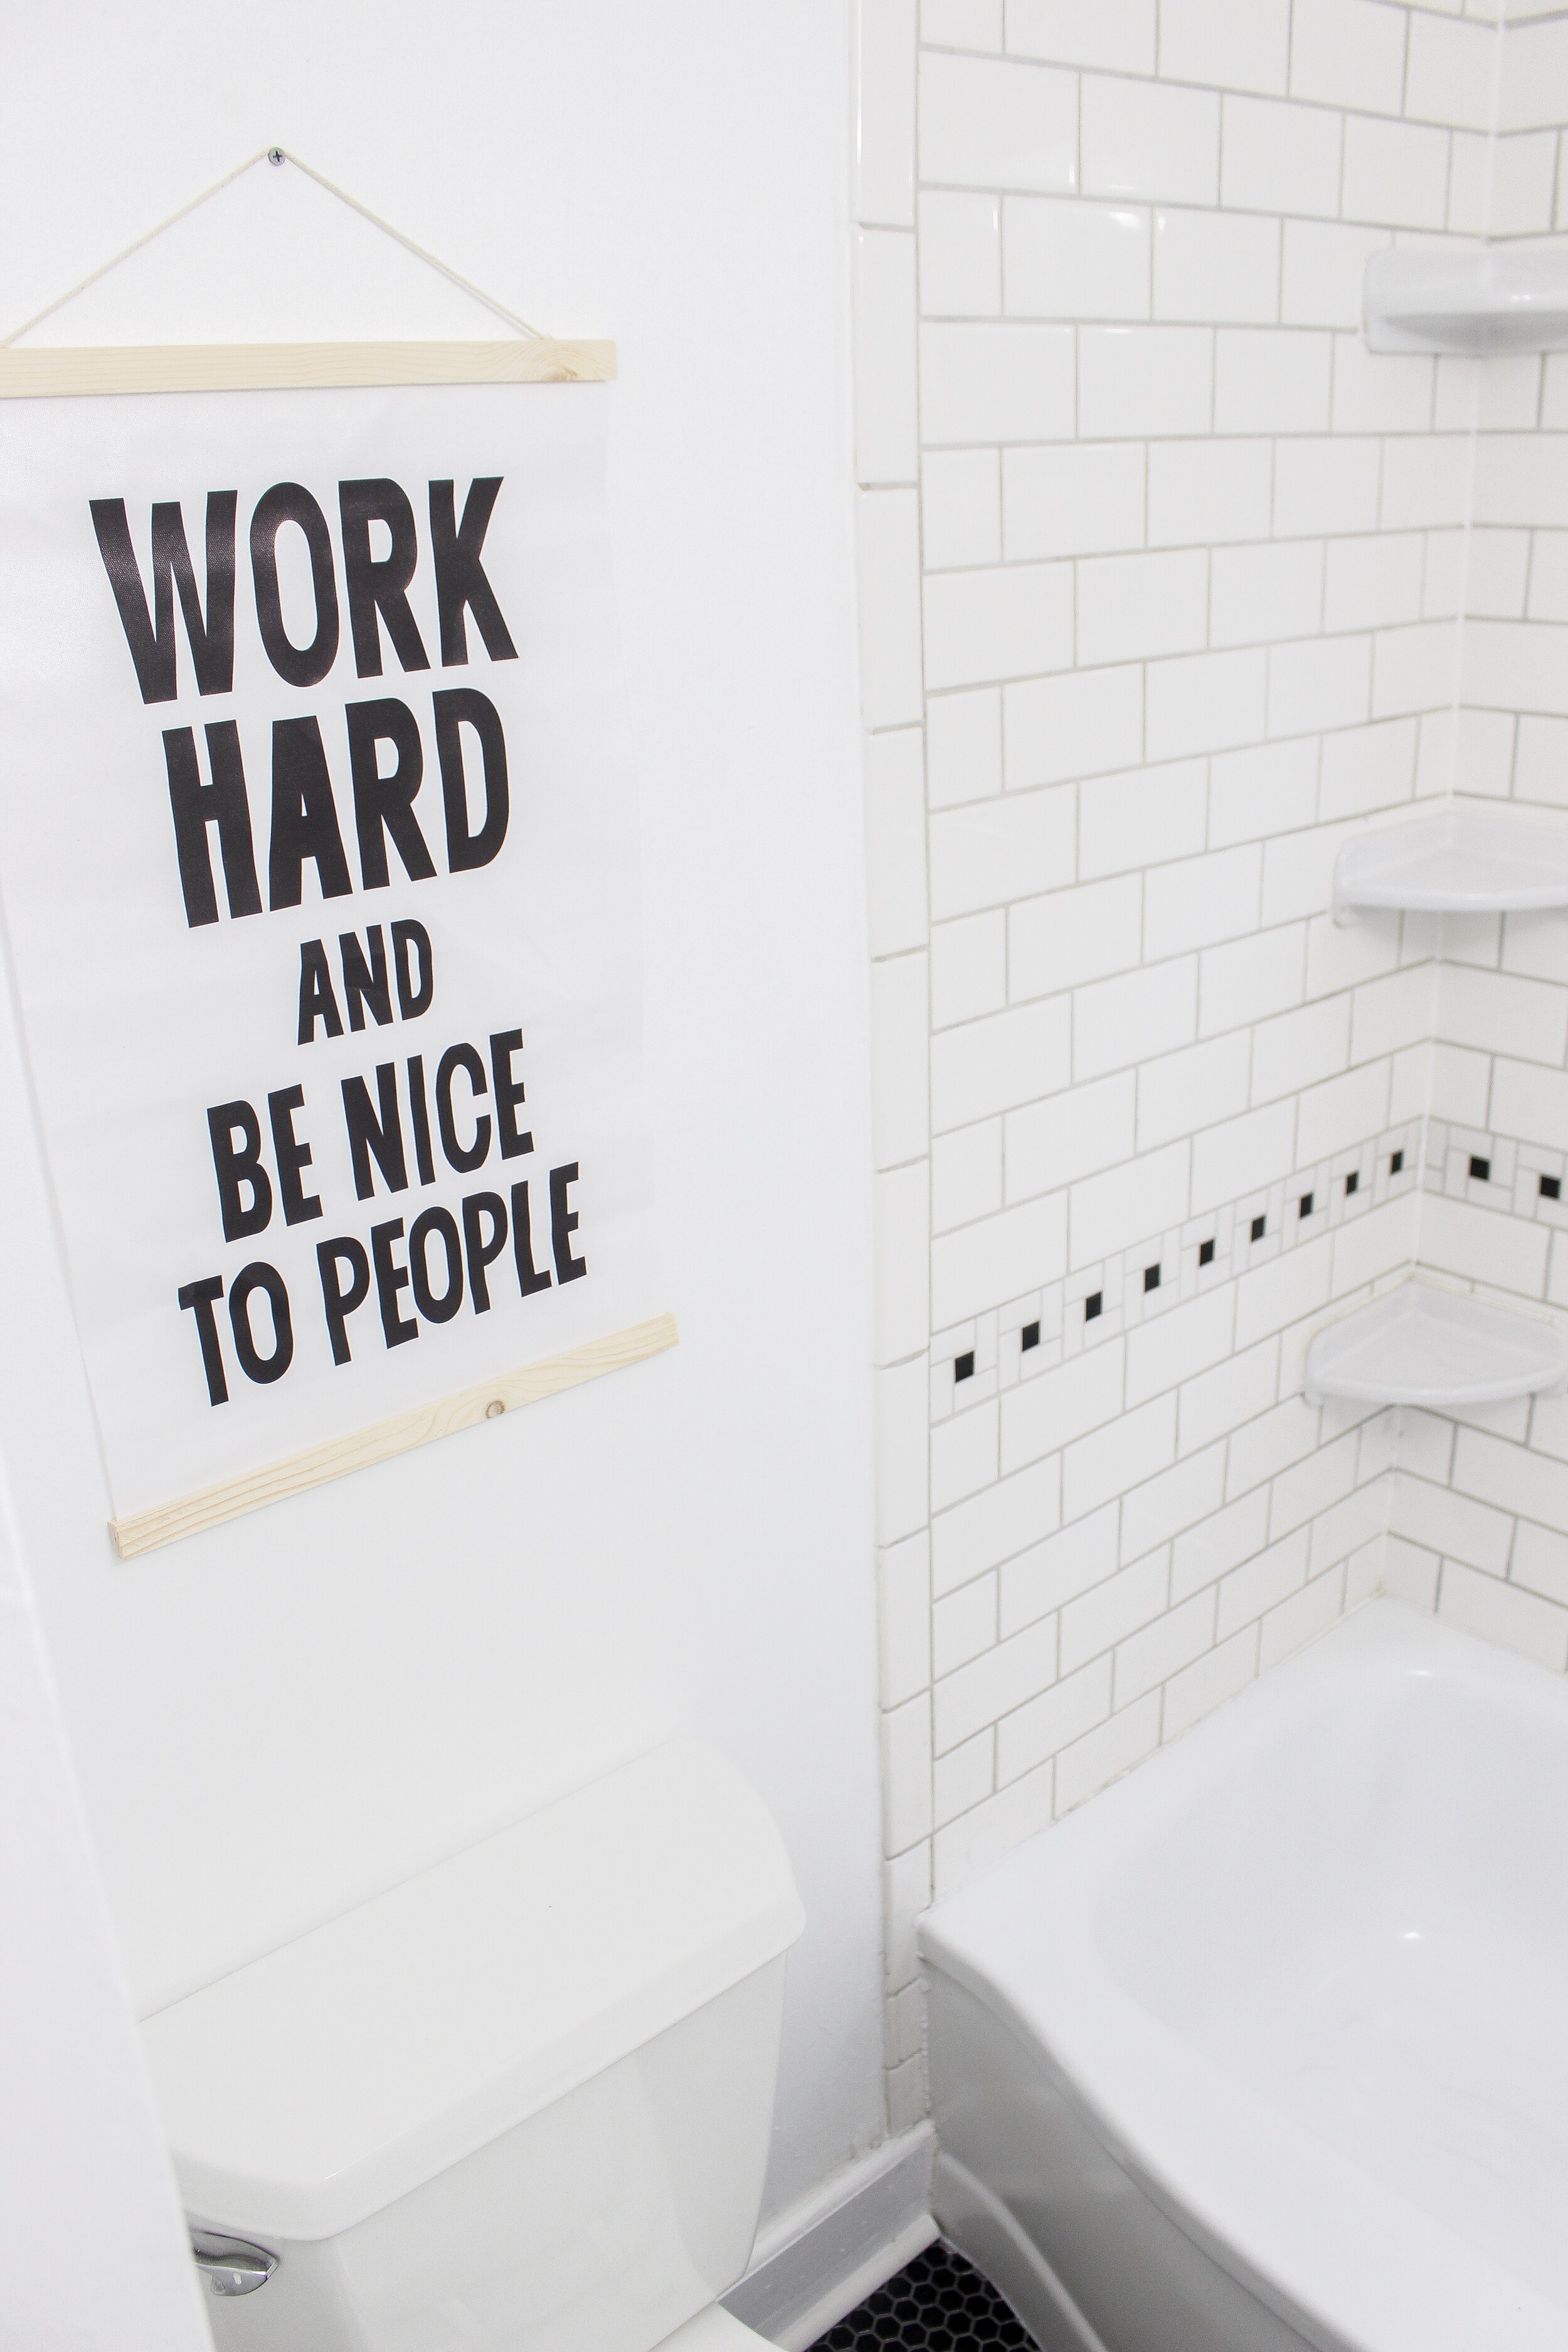
Subway tile is one of the most affordable and classic ways to add value and cleanliness to a home. I love the bright and airiness of the white tiles contrasted by grey grout and finished off with a pop of brass.
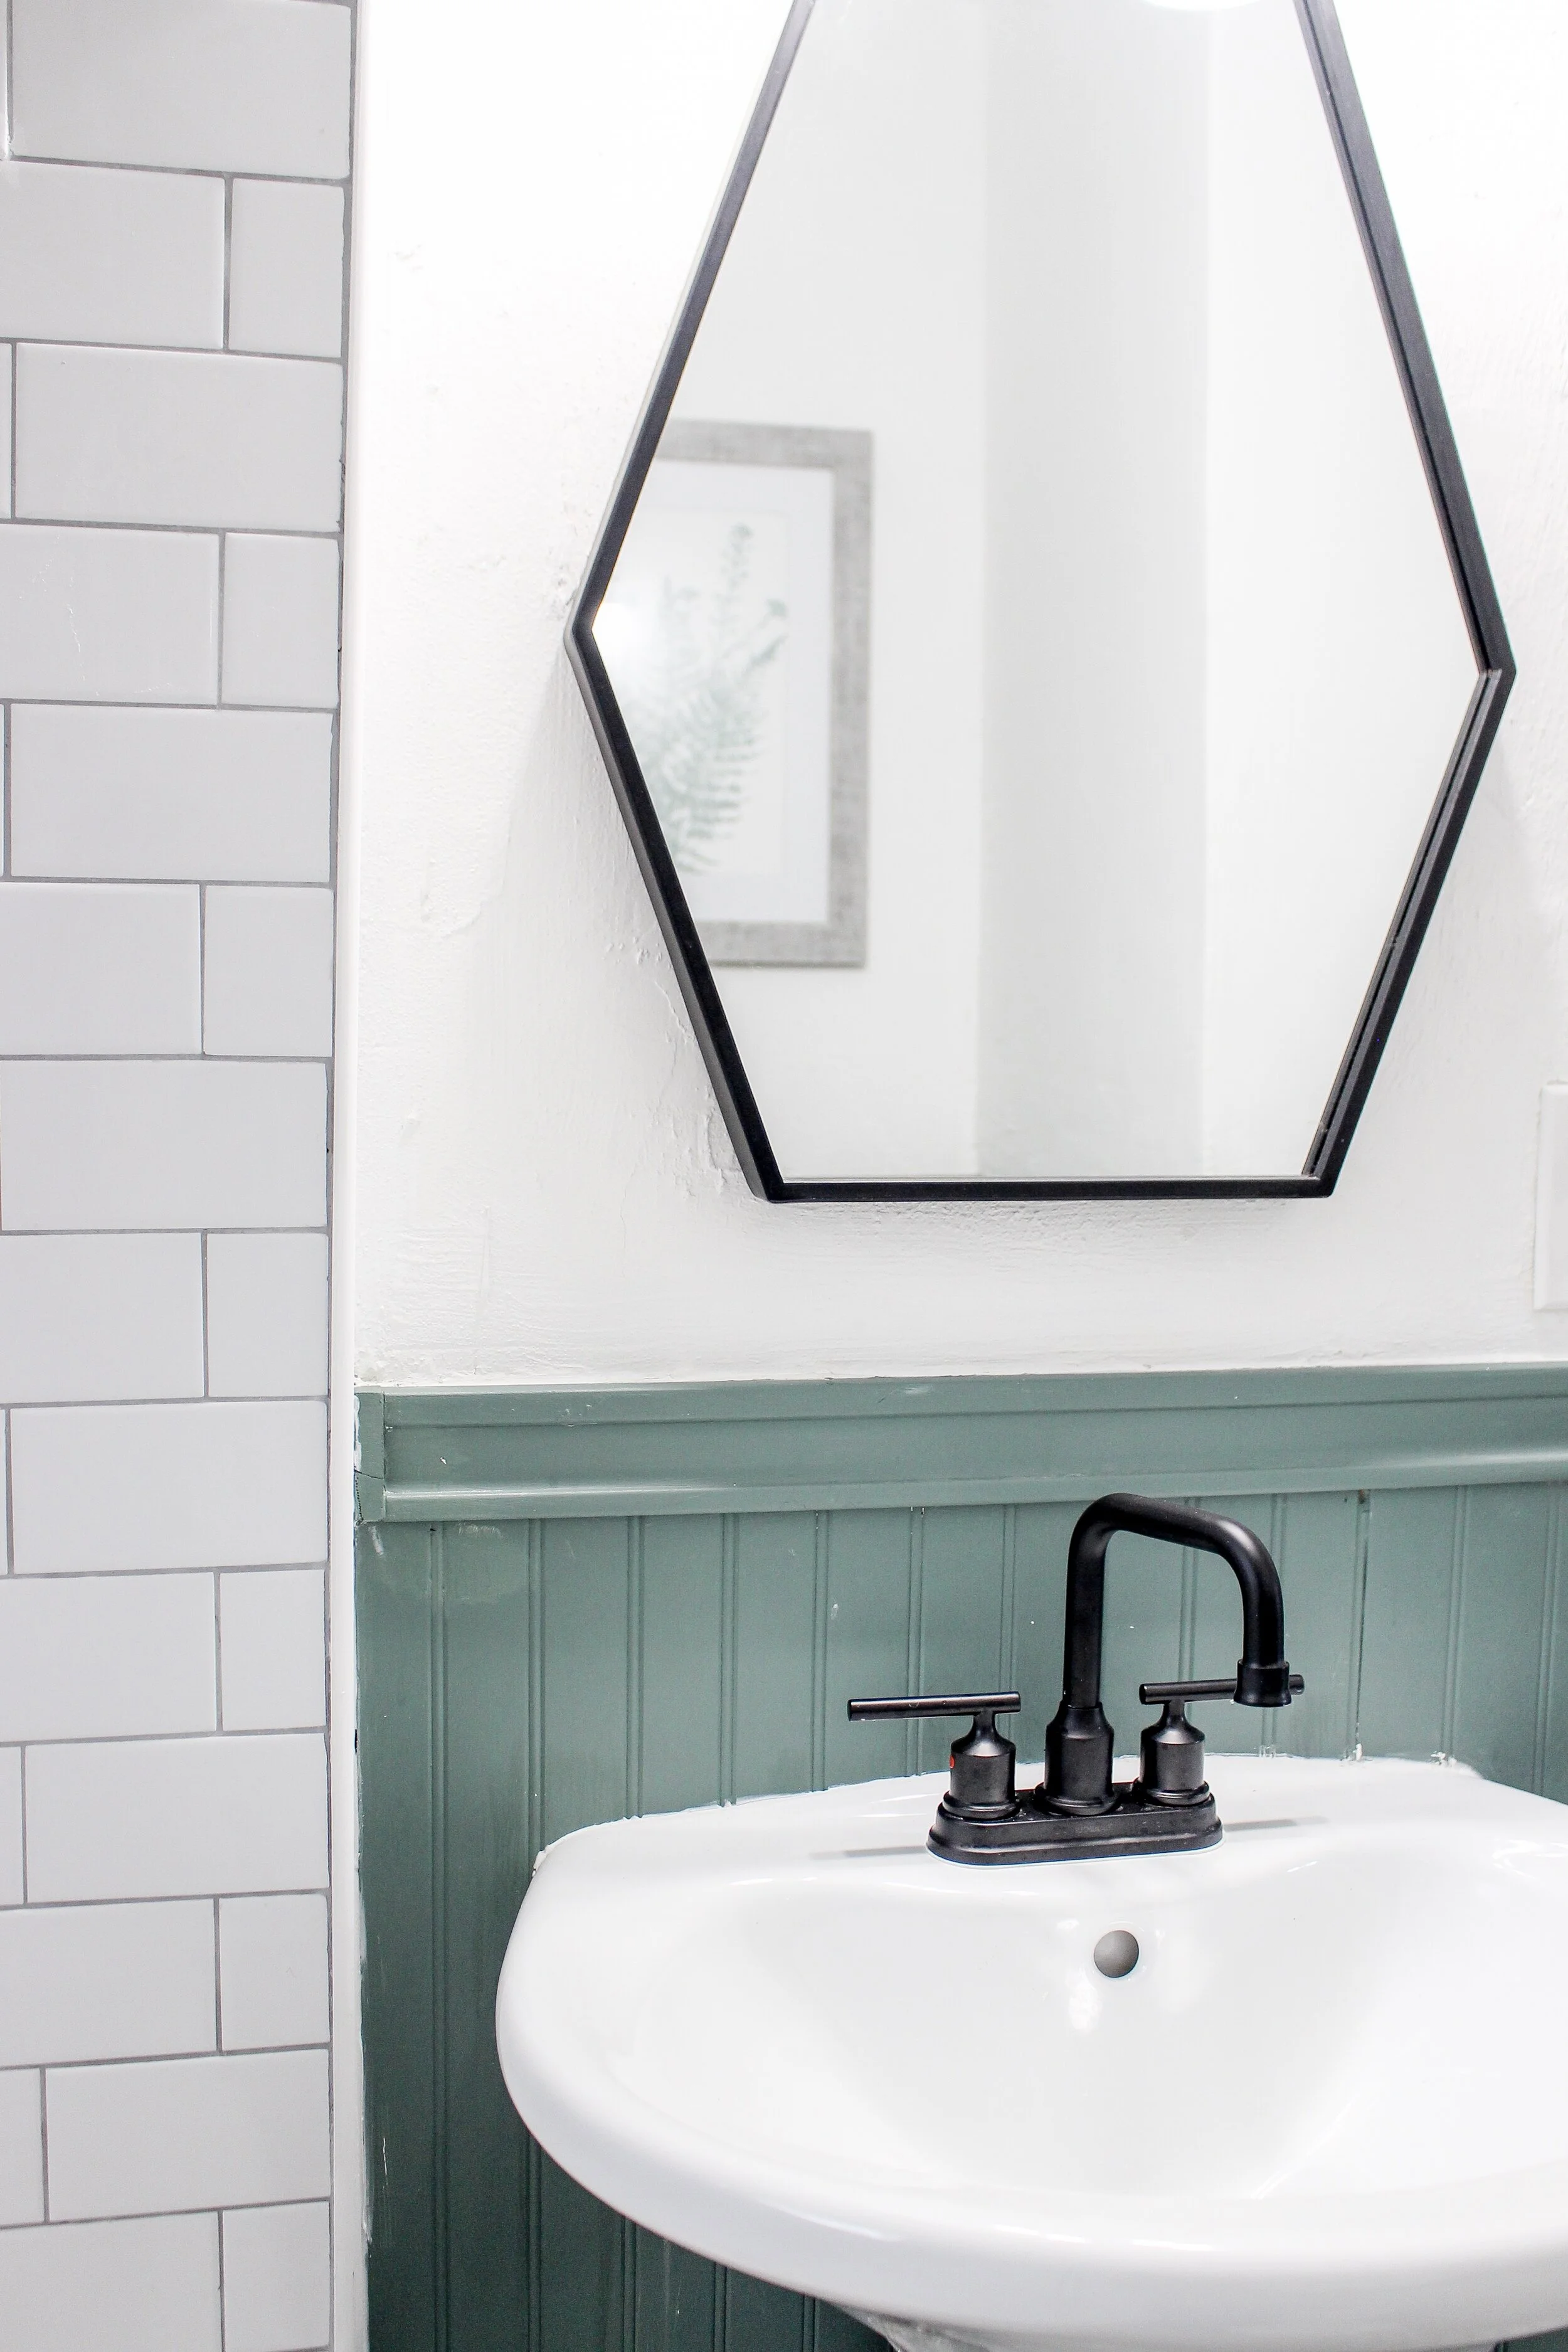
I loved how the geometric mirror picked up the clean lines in the floor tile and also gave the room a new and original vibe to pair with the classics.
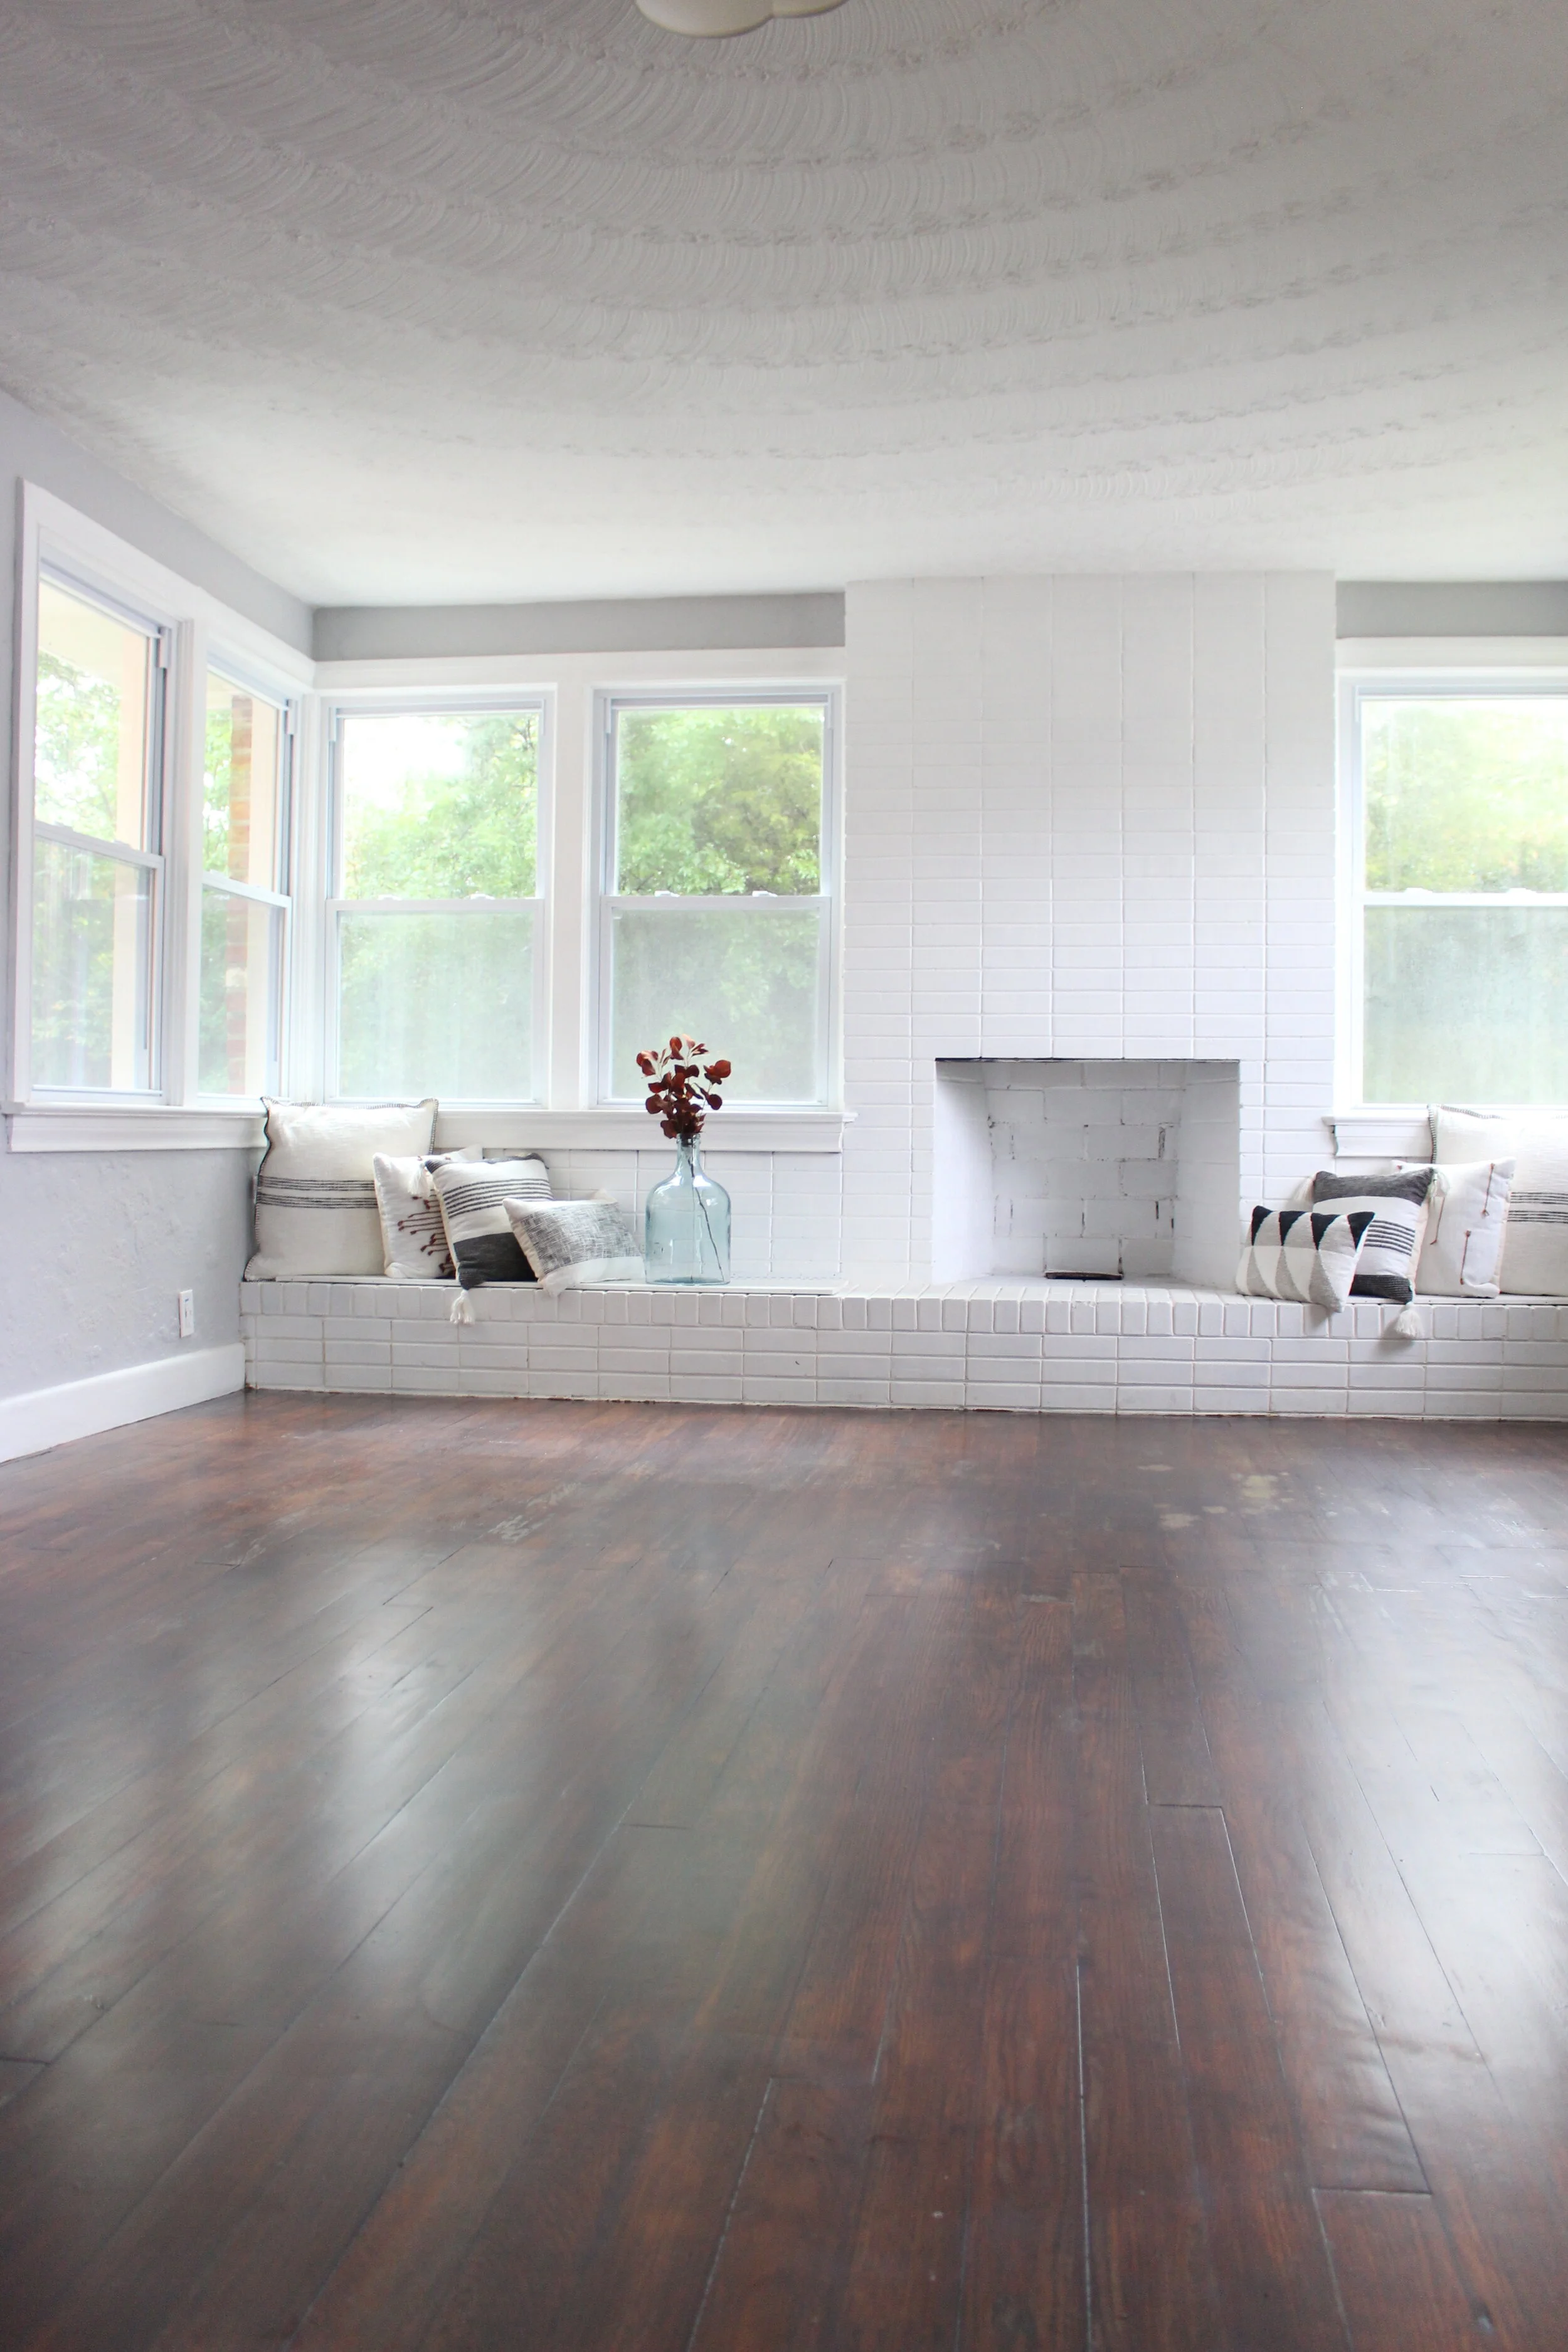
The Living Room
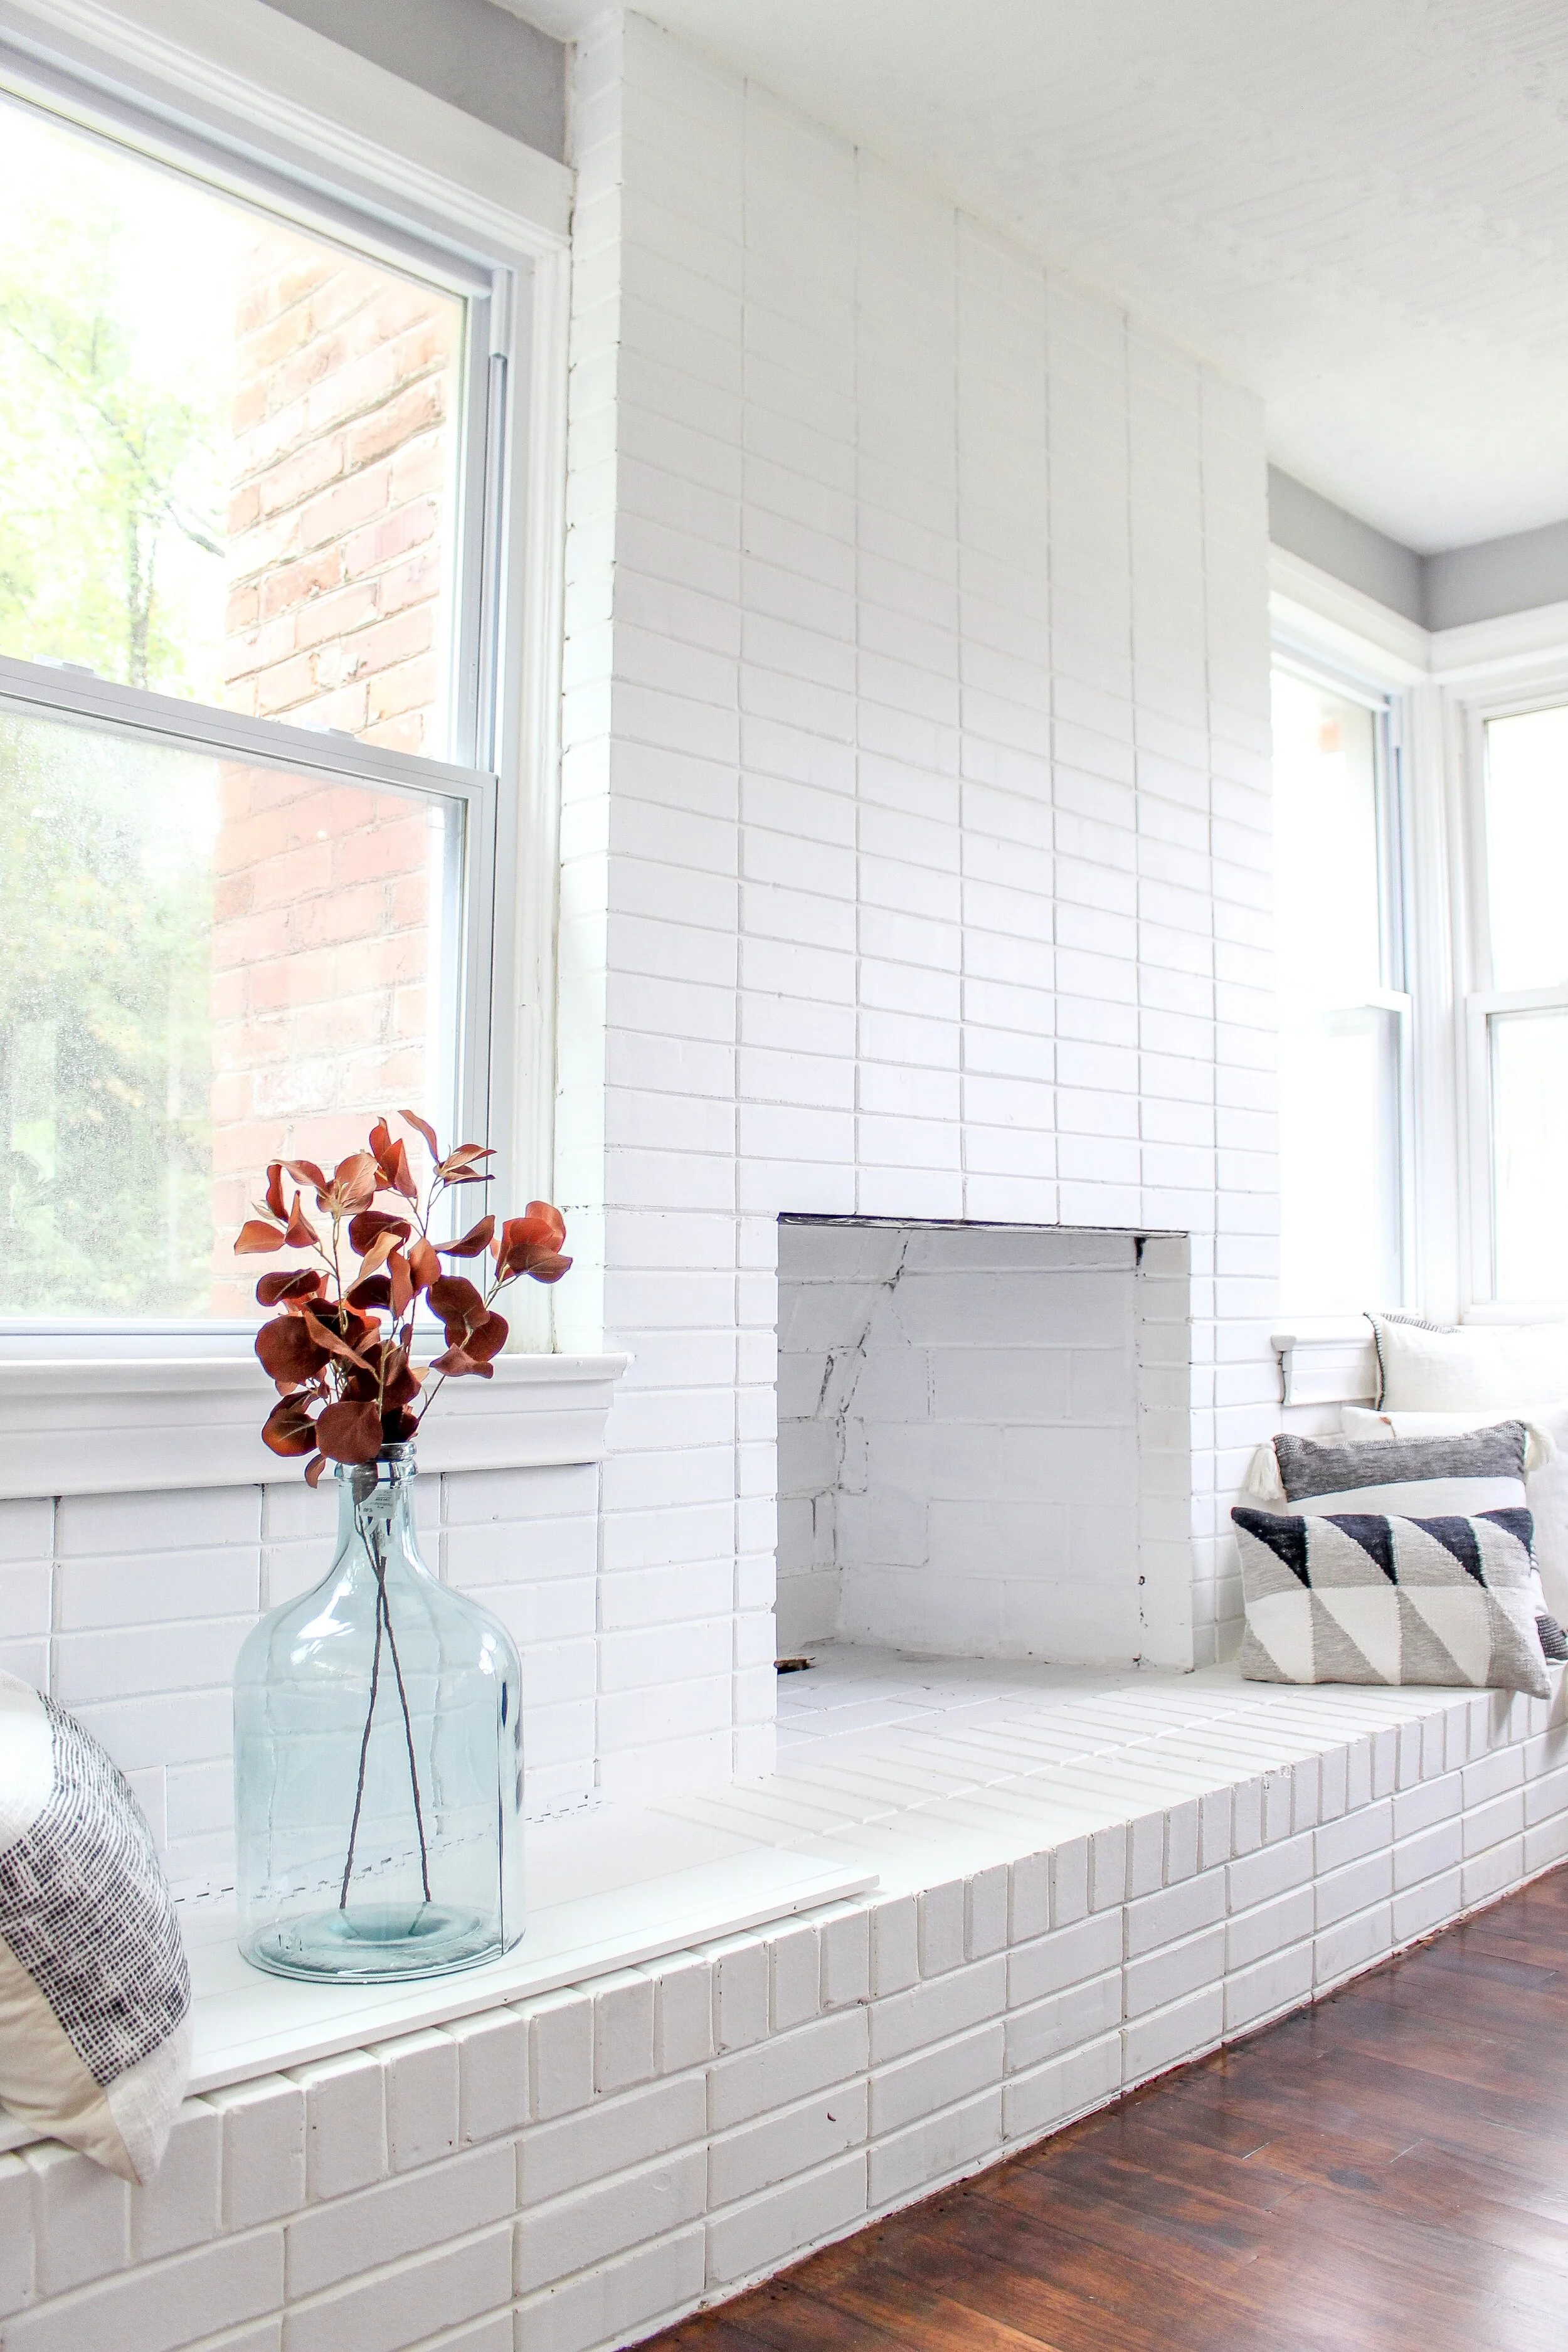
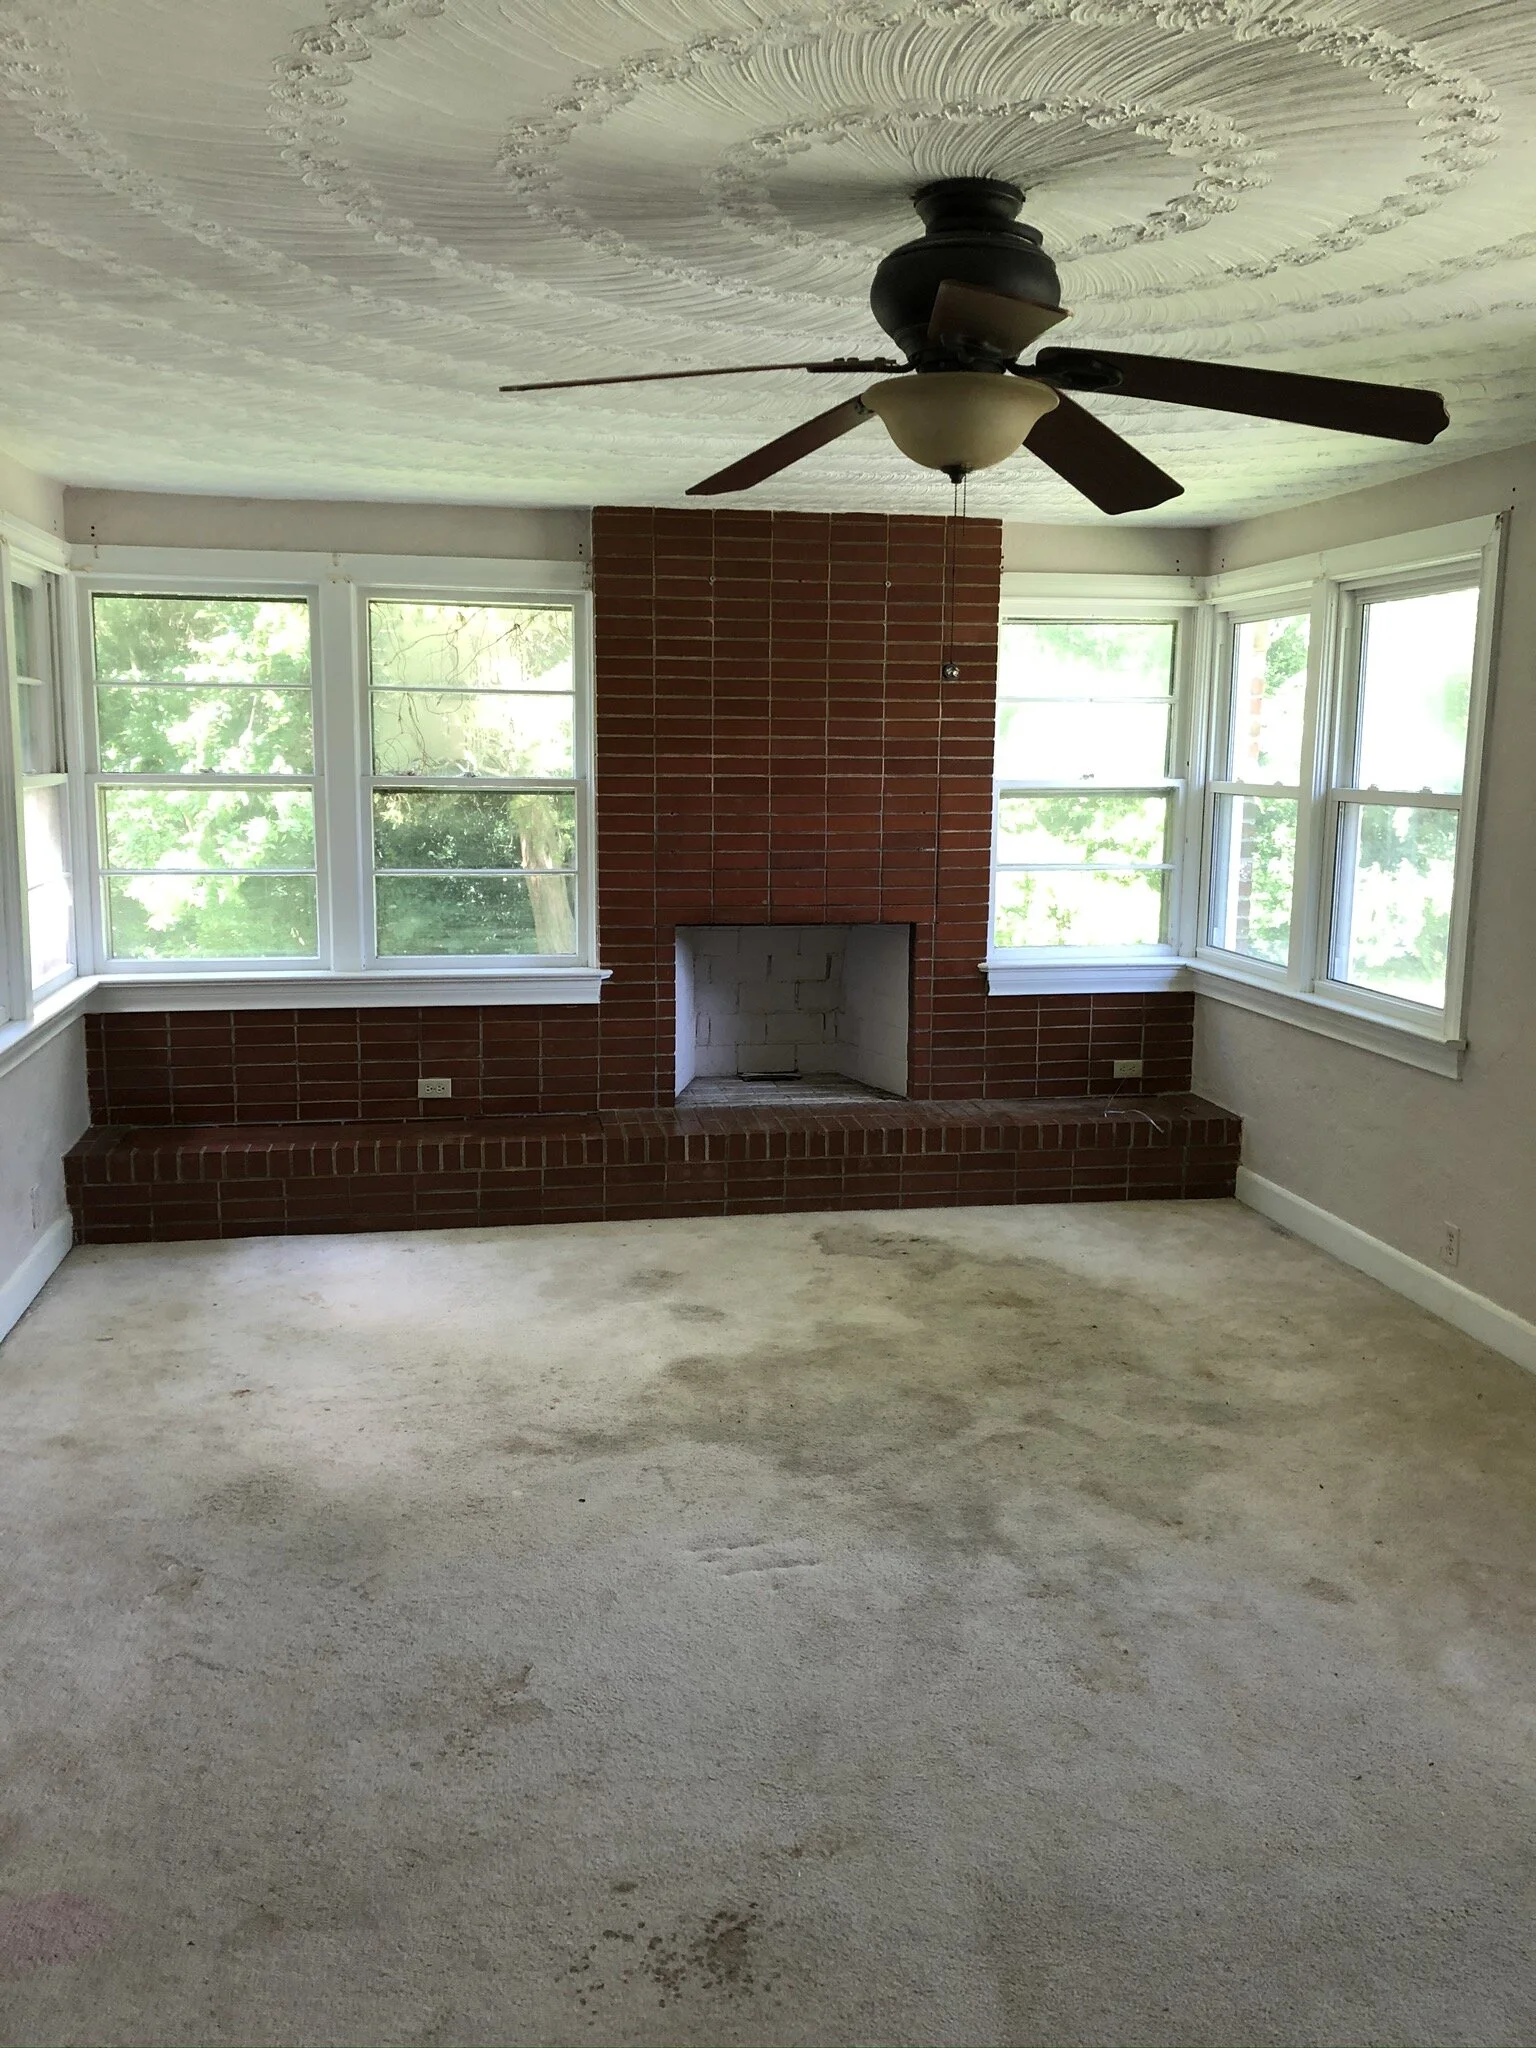
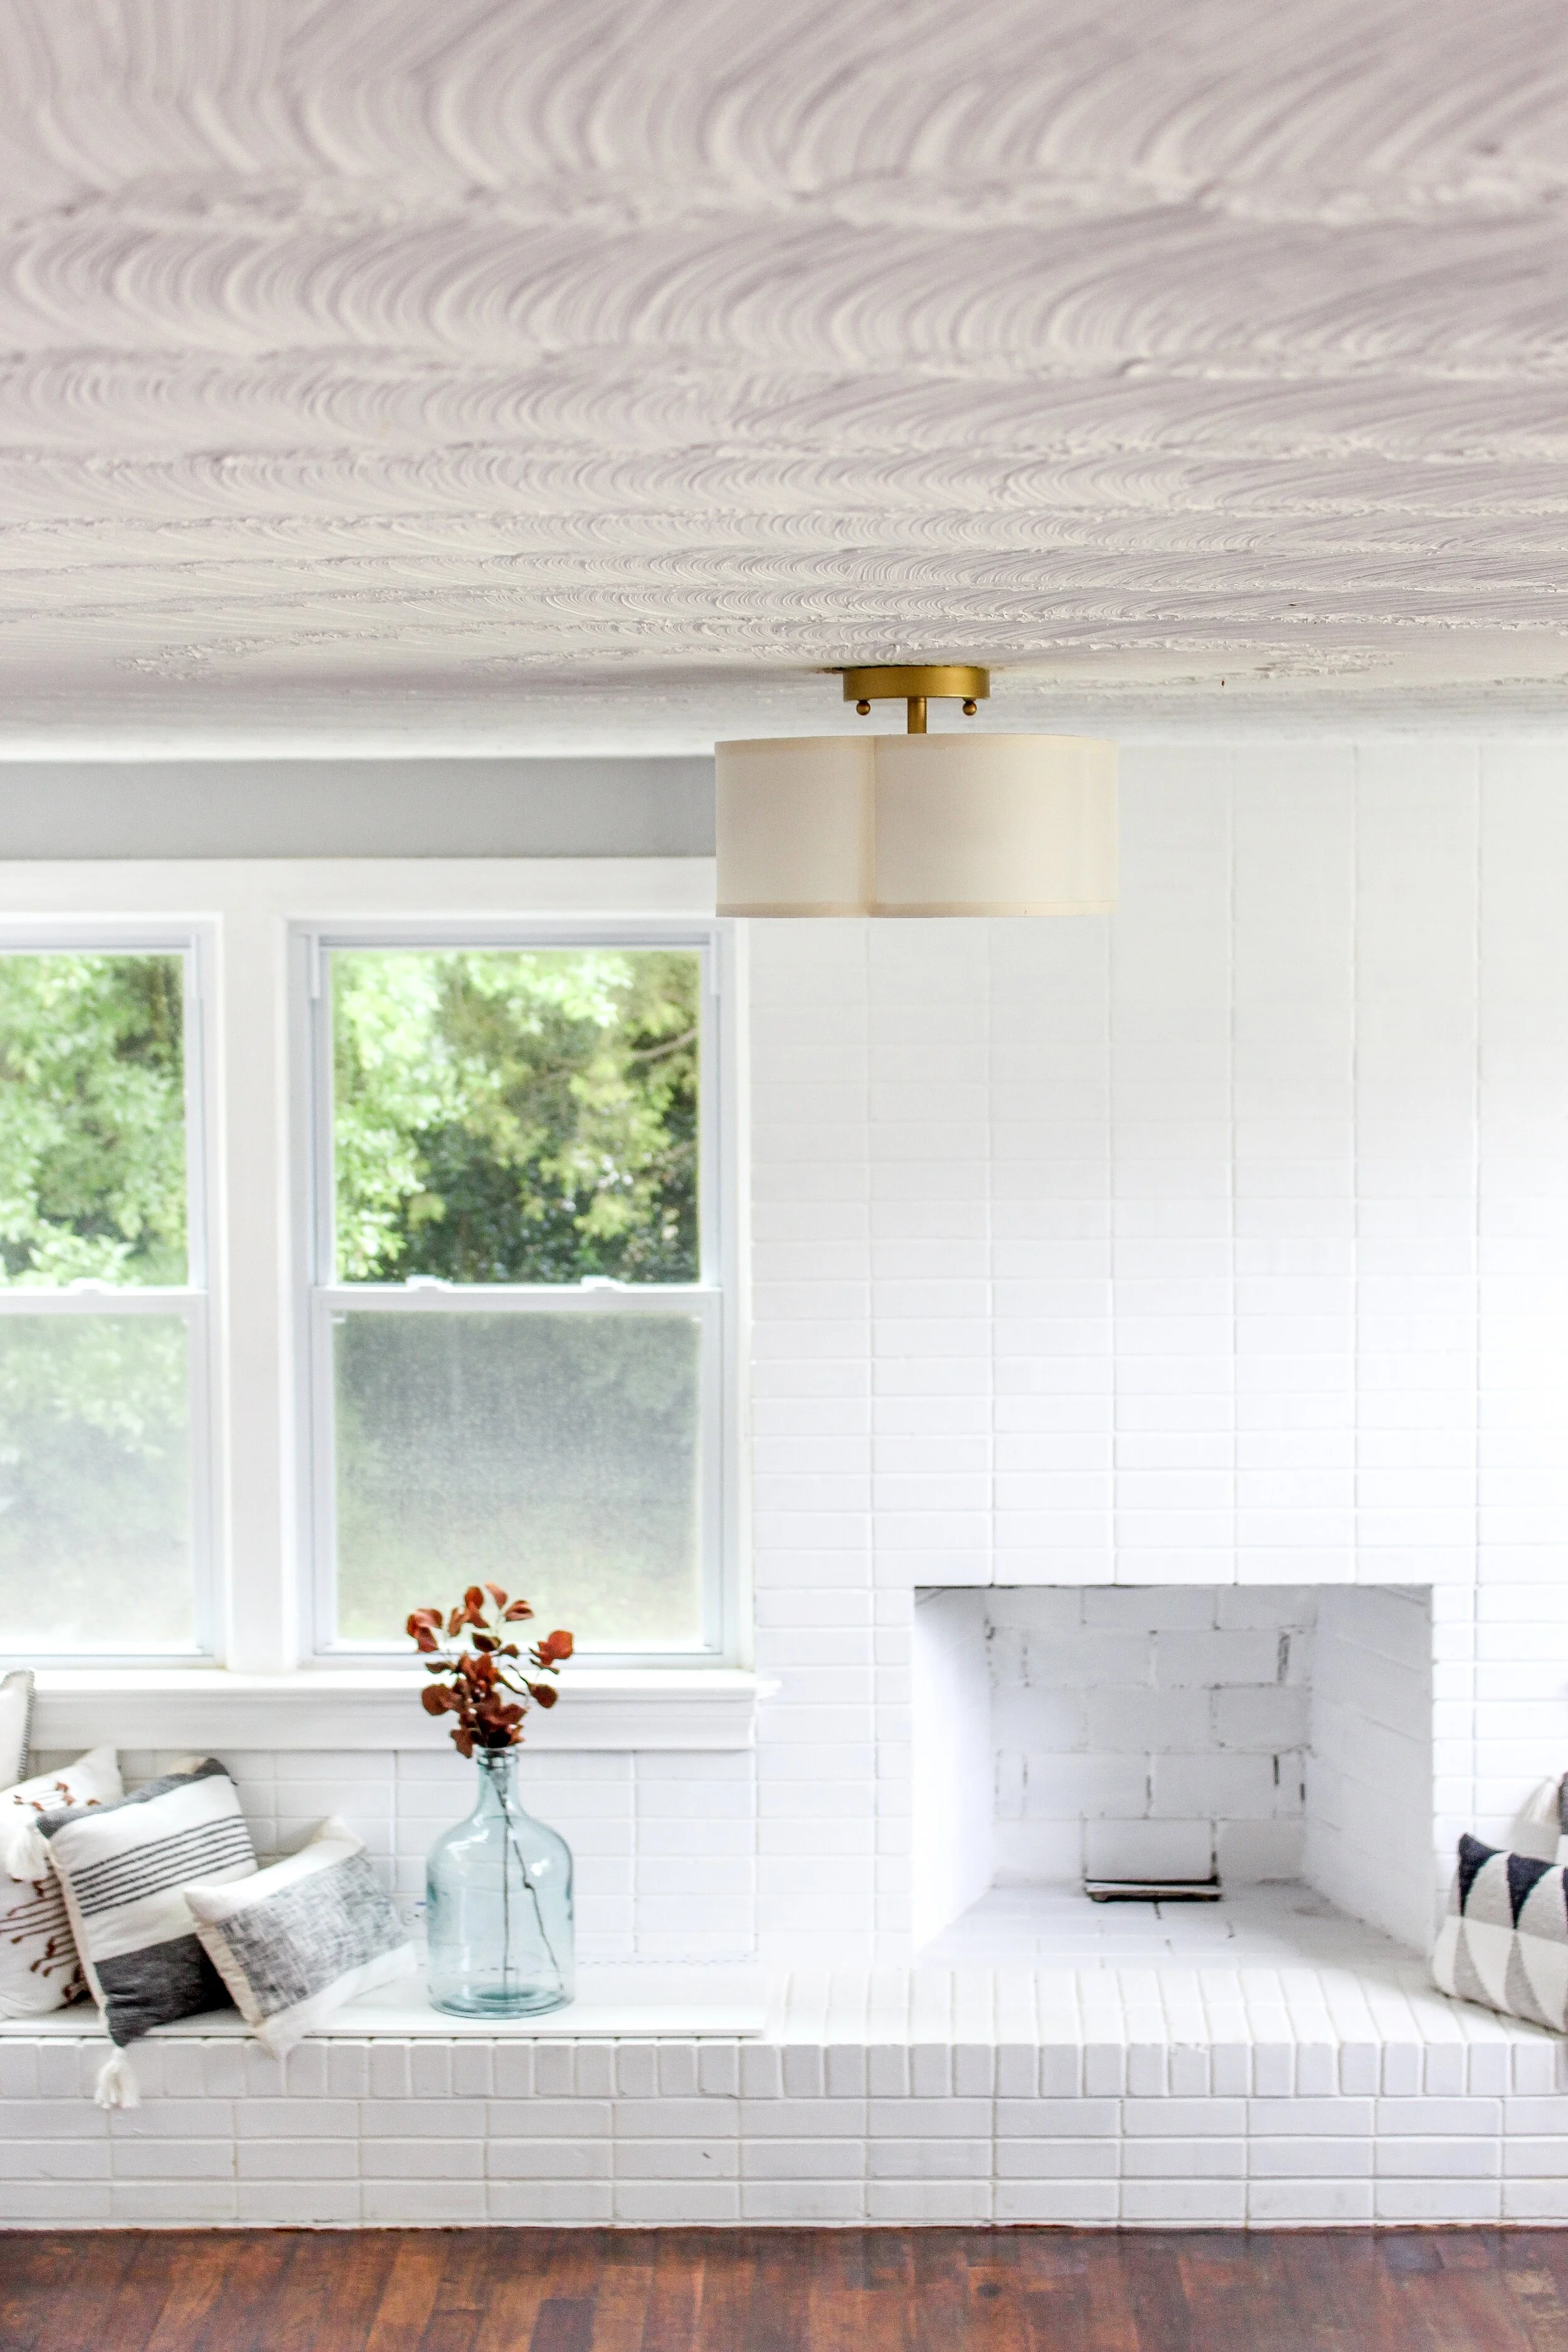
I little wood stain and white paint took this living room to new heights. I’m so glad after a long debate with myself about what color to paint the fireplace that I went for a classic white. I almost did another greenish black or dark color but I think sometimes the simpler the better.
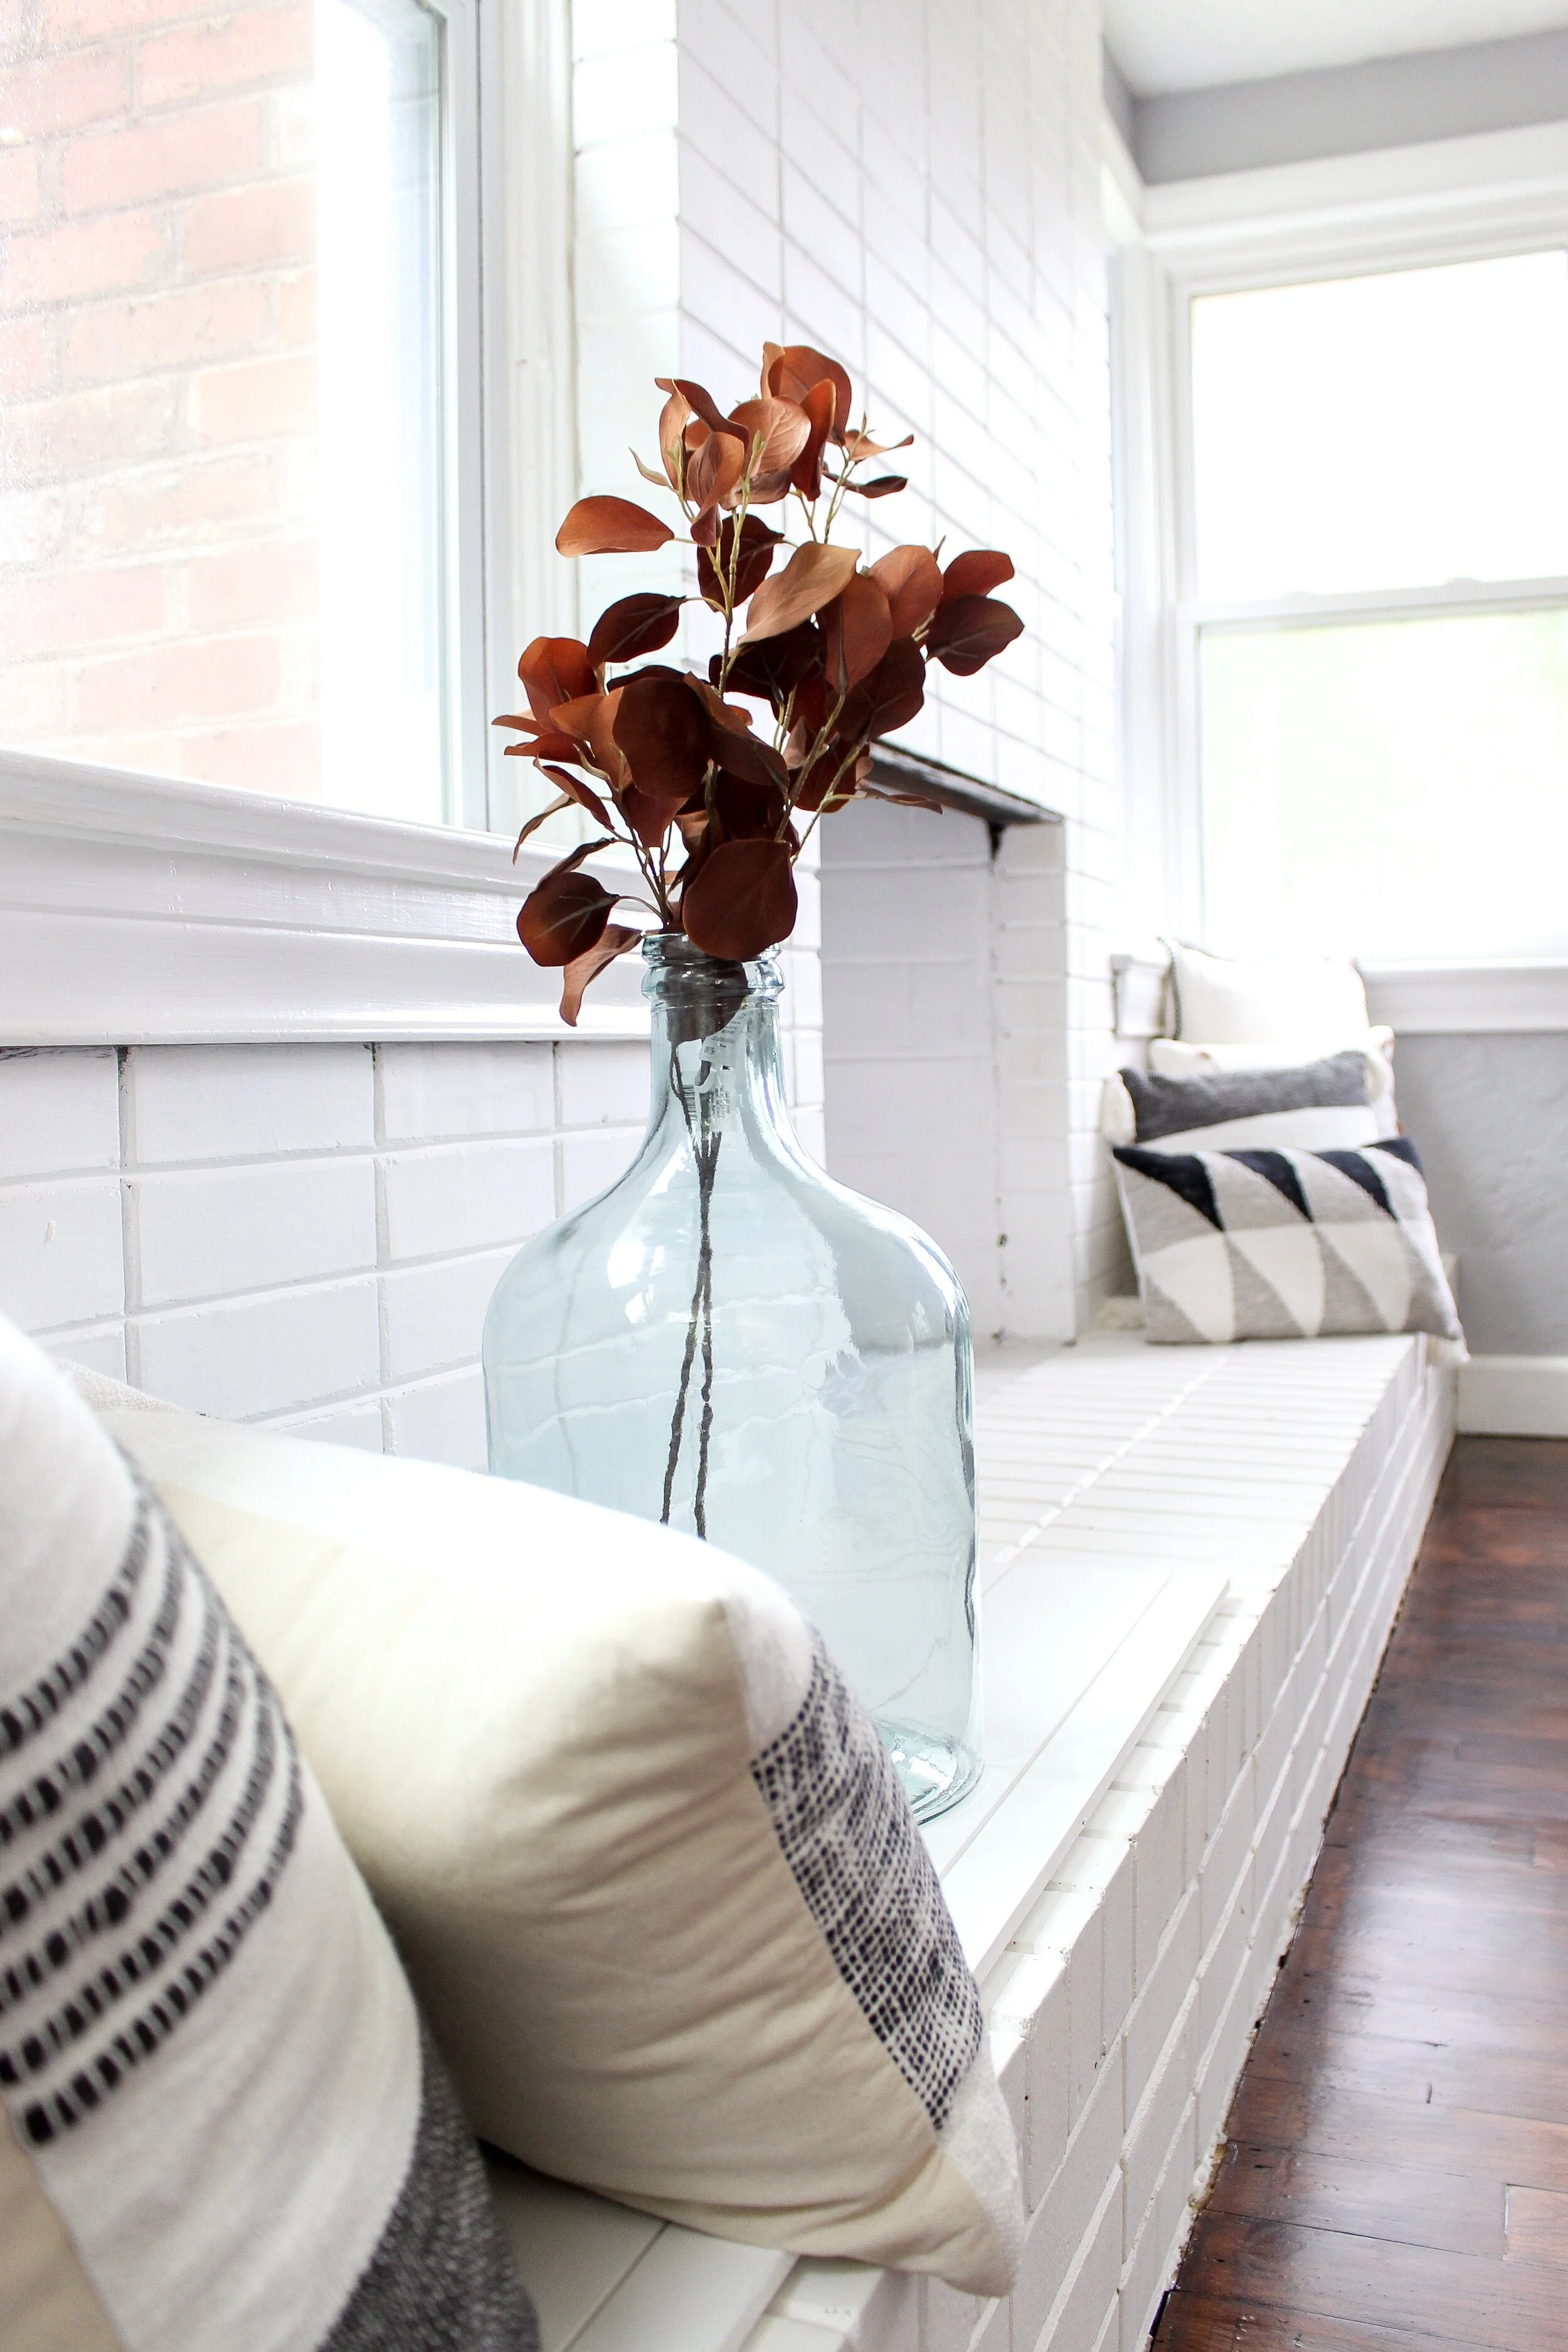
Our Carpenter and full time employee, Matt, did a great job on the bench seats and aded a nice paneled top that allowed for more storage.
The Upstair Bathroom and Bedrooms

Sometimes when flipping a house you get lucky. This upstairs bathroom threw us a bone with what looked like a fairly new renovated shower. We kept the subway tile shower and worked off of it for the rest of the bathroom design.
I chose small black hex tiles for the bathroom floor to compliment the already installed trim around the shower. I knew I wanted a classic black and white theme in this room and continued it in the fixtures and lighting as well.

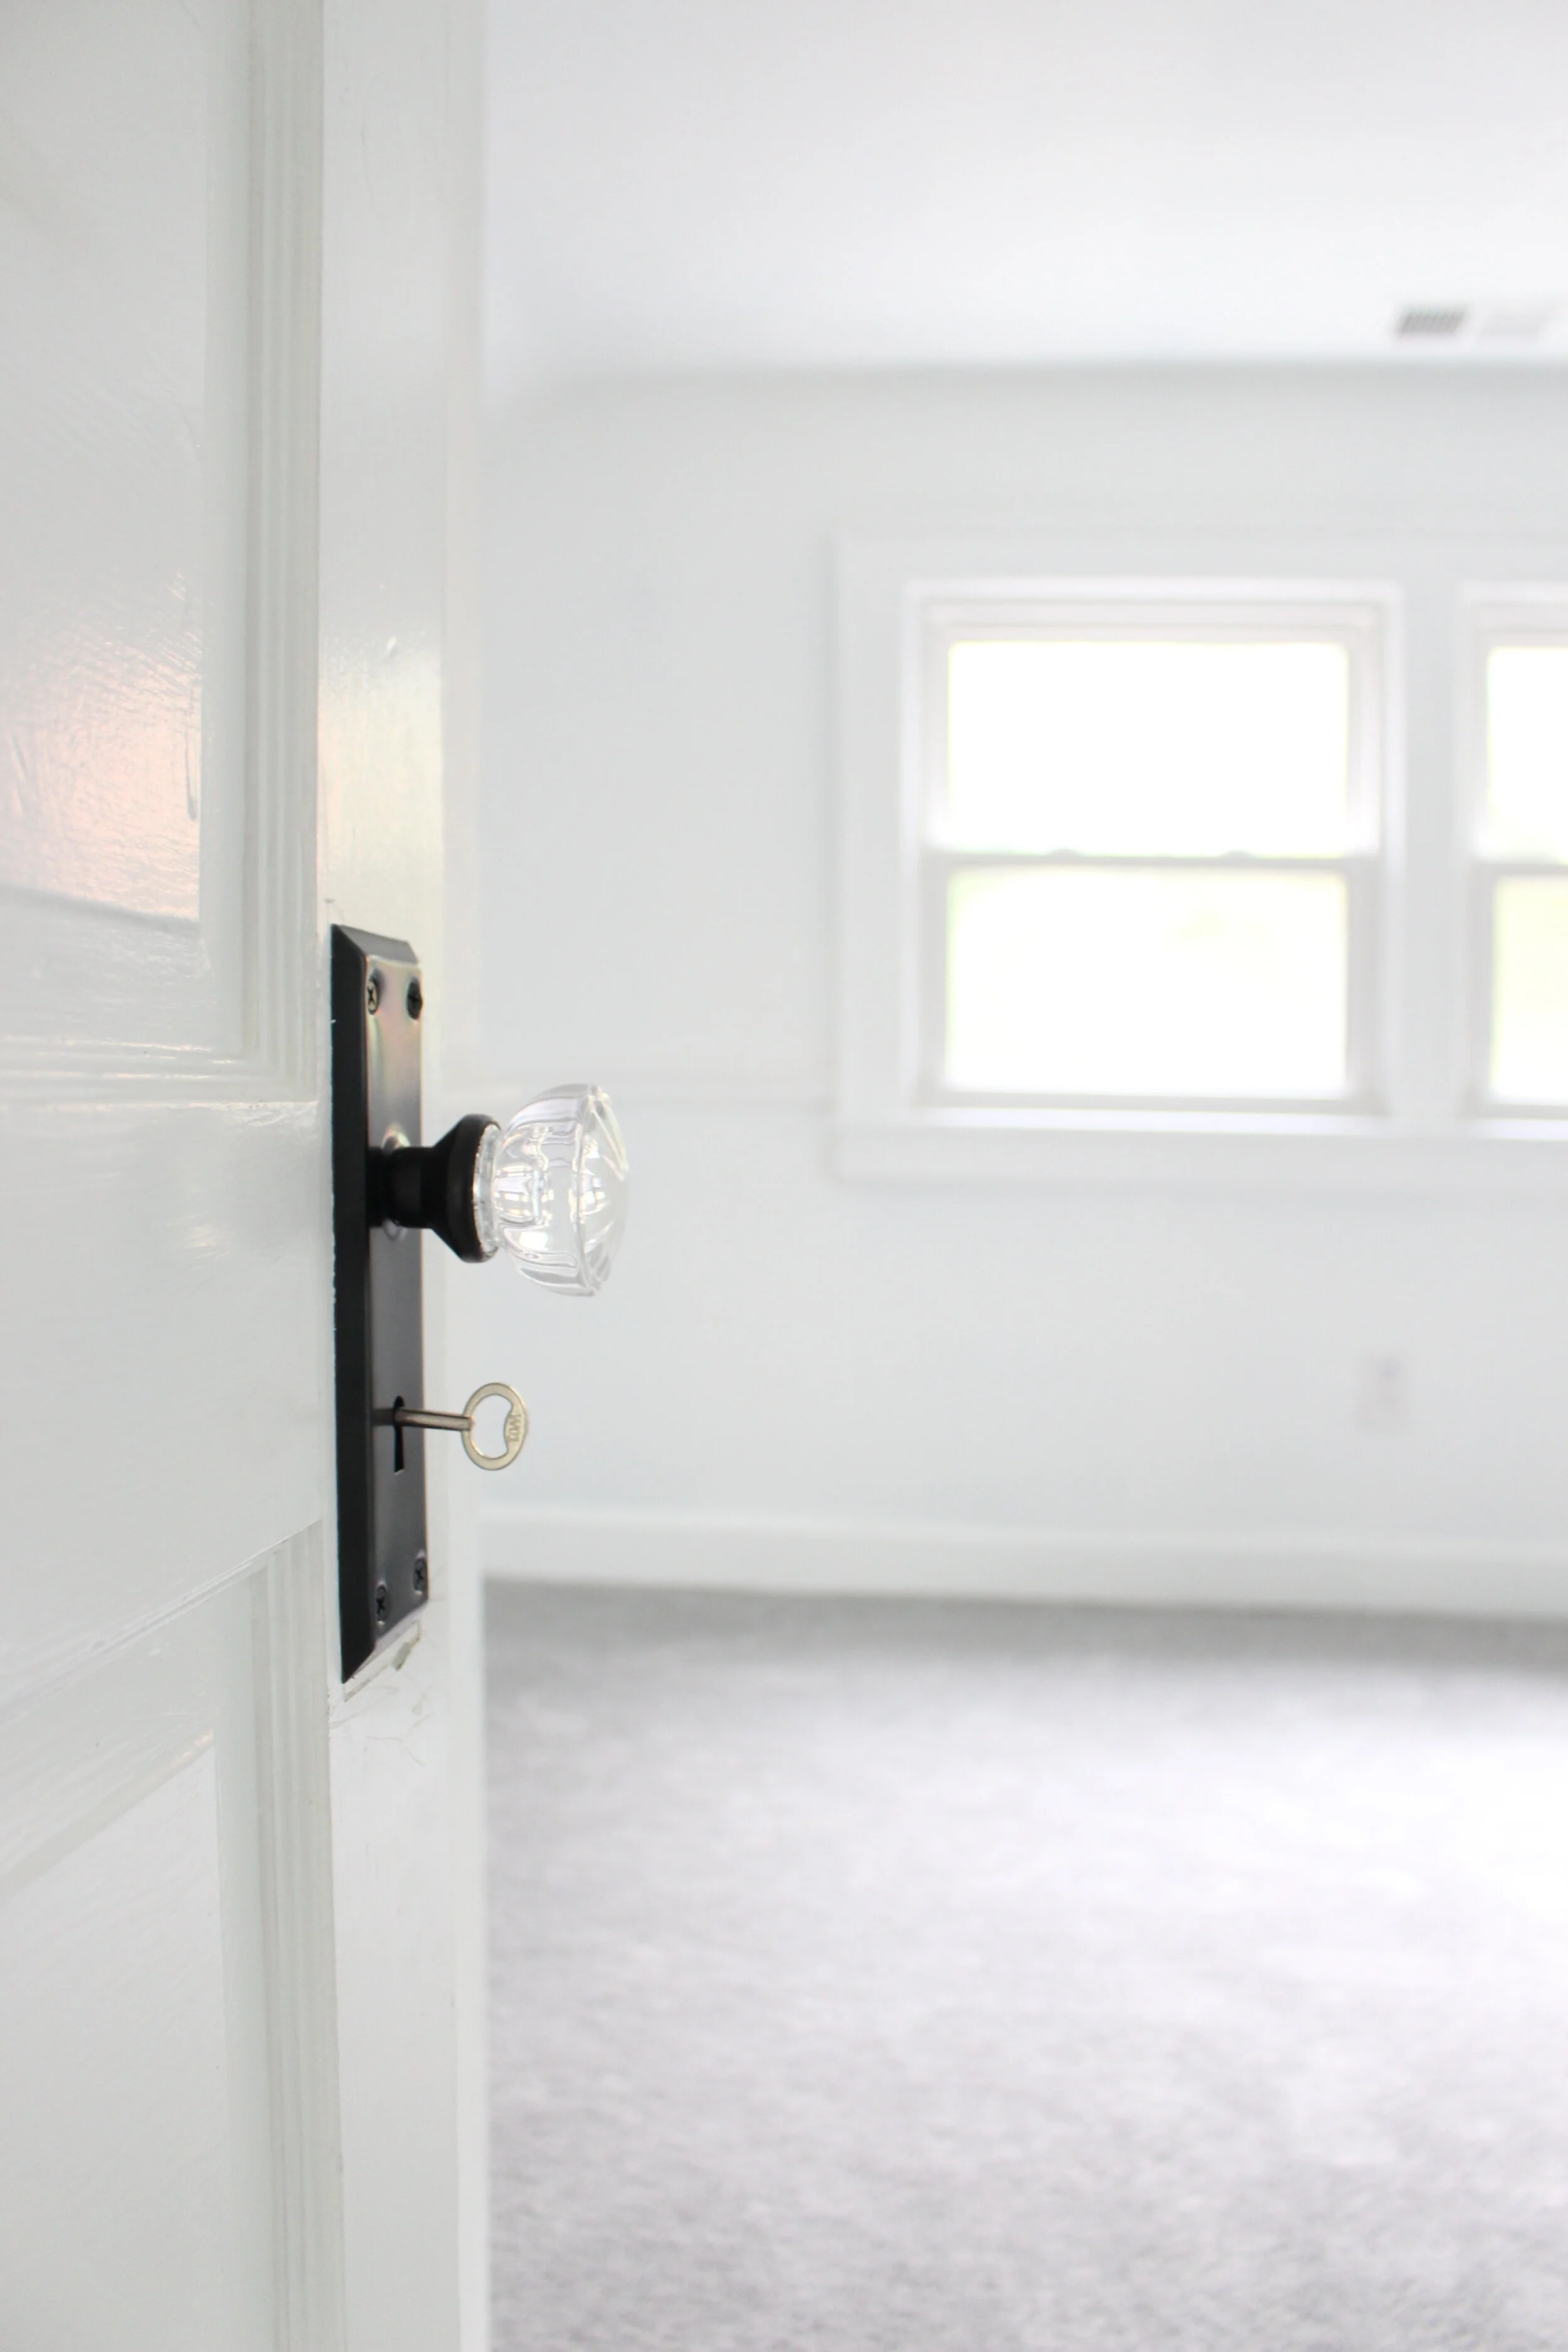
The little key there on the sink was the cutest little detail to some of the doors upstairs. Sean and I hadn’t seen a lock and key interior door for a long time. We decided it was charming and kept the old doors.
We carpeted the entire upstairs and unfortunately, due to some floor stairs in the downstairs living room, decided to carpet overtop the original hardwoods near the fireplace. Sean and his team tried so hard to recreate the beautiful flawlessness of the original hardwoods in the downstairs but just couldn’t swing it with some of the depth of the wear and tear on the floor. Carpeting was definitely the safest choice even though the house was shown to most viewers with the stained hardwoods. Once the carpets went it, it didn’t take long to receive the offer we were waiting for.
It may look it, but Taylor Road was not all sunshine and rainbows. It took 3 weeks and 2 price drops to receive an offer worth accepting. Even though we did have to drop the price a couple times, in the end, we still profited a good amount. The goal is always full price but sometimes it’s better to wrap it up, throw in the towel and pay back what you owe so you can risk it all again on the next one. I bet you want to flip houses now, right? The only way we survive doing this is absolutely loving this process, pitfalls and all. You just keep going doing, building, and creating what you love.
Sean said to me after work the other day, “ My job doesn't feel like work. I show up to the project and work a full day yet I don’t even feel like I have a job. It feels like cheating!” Well, babe, ain’t that the goal. When your Monday to Friday feels like “cheating” the system, I’d say you have arrived.
Ann | DESIGN