
Breakfast Nook Bench Seat DIY
Virginia Beach, VA - Home Base
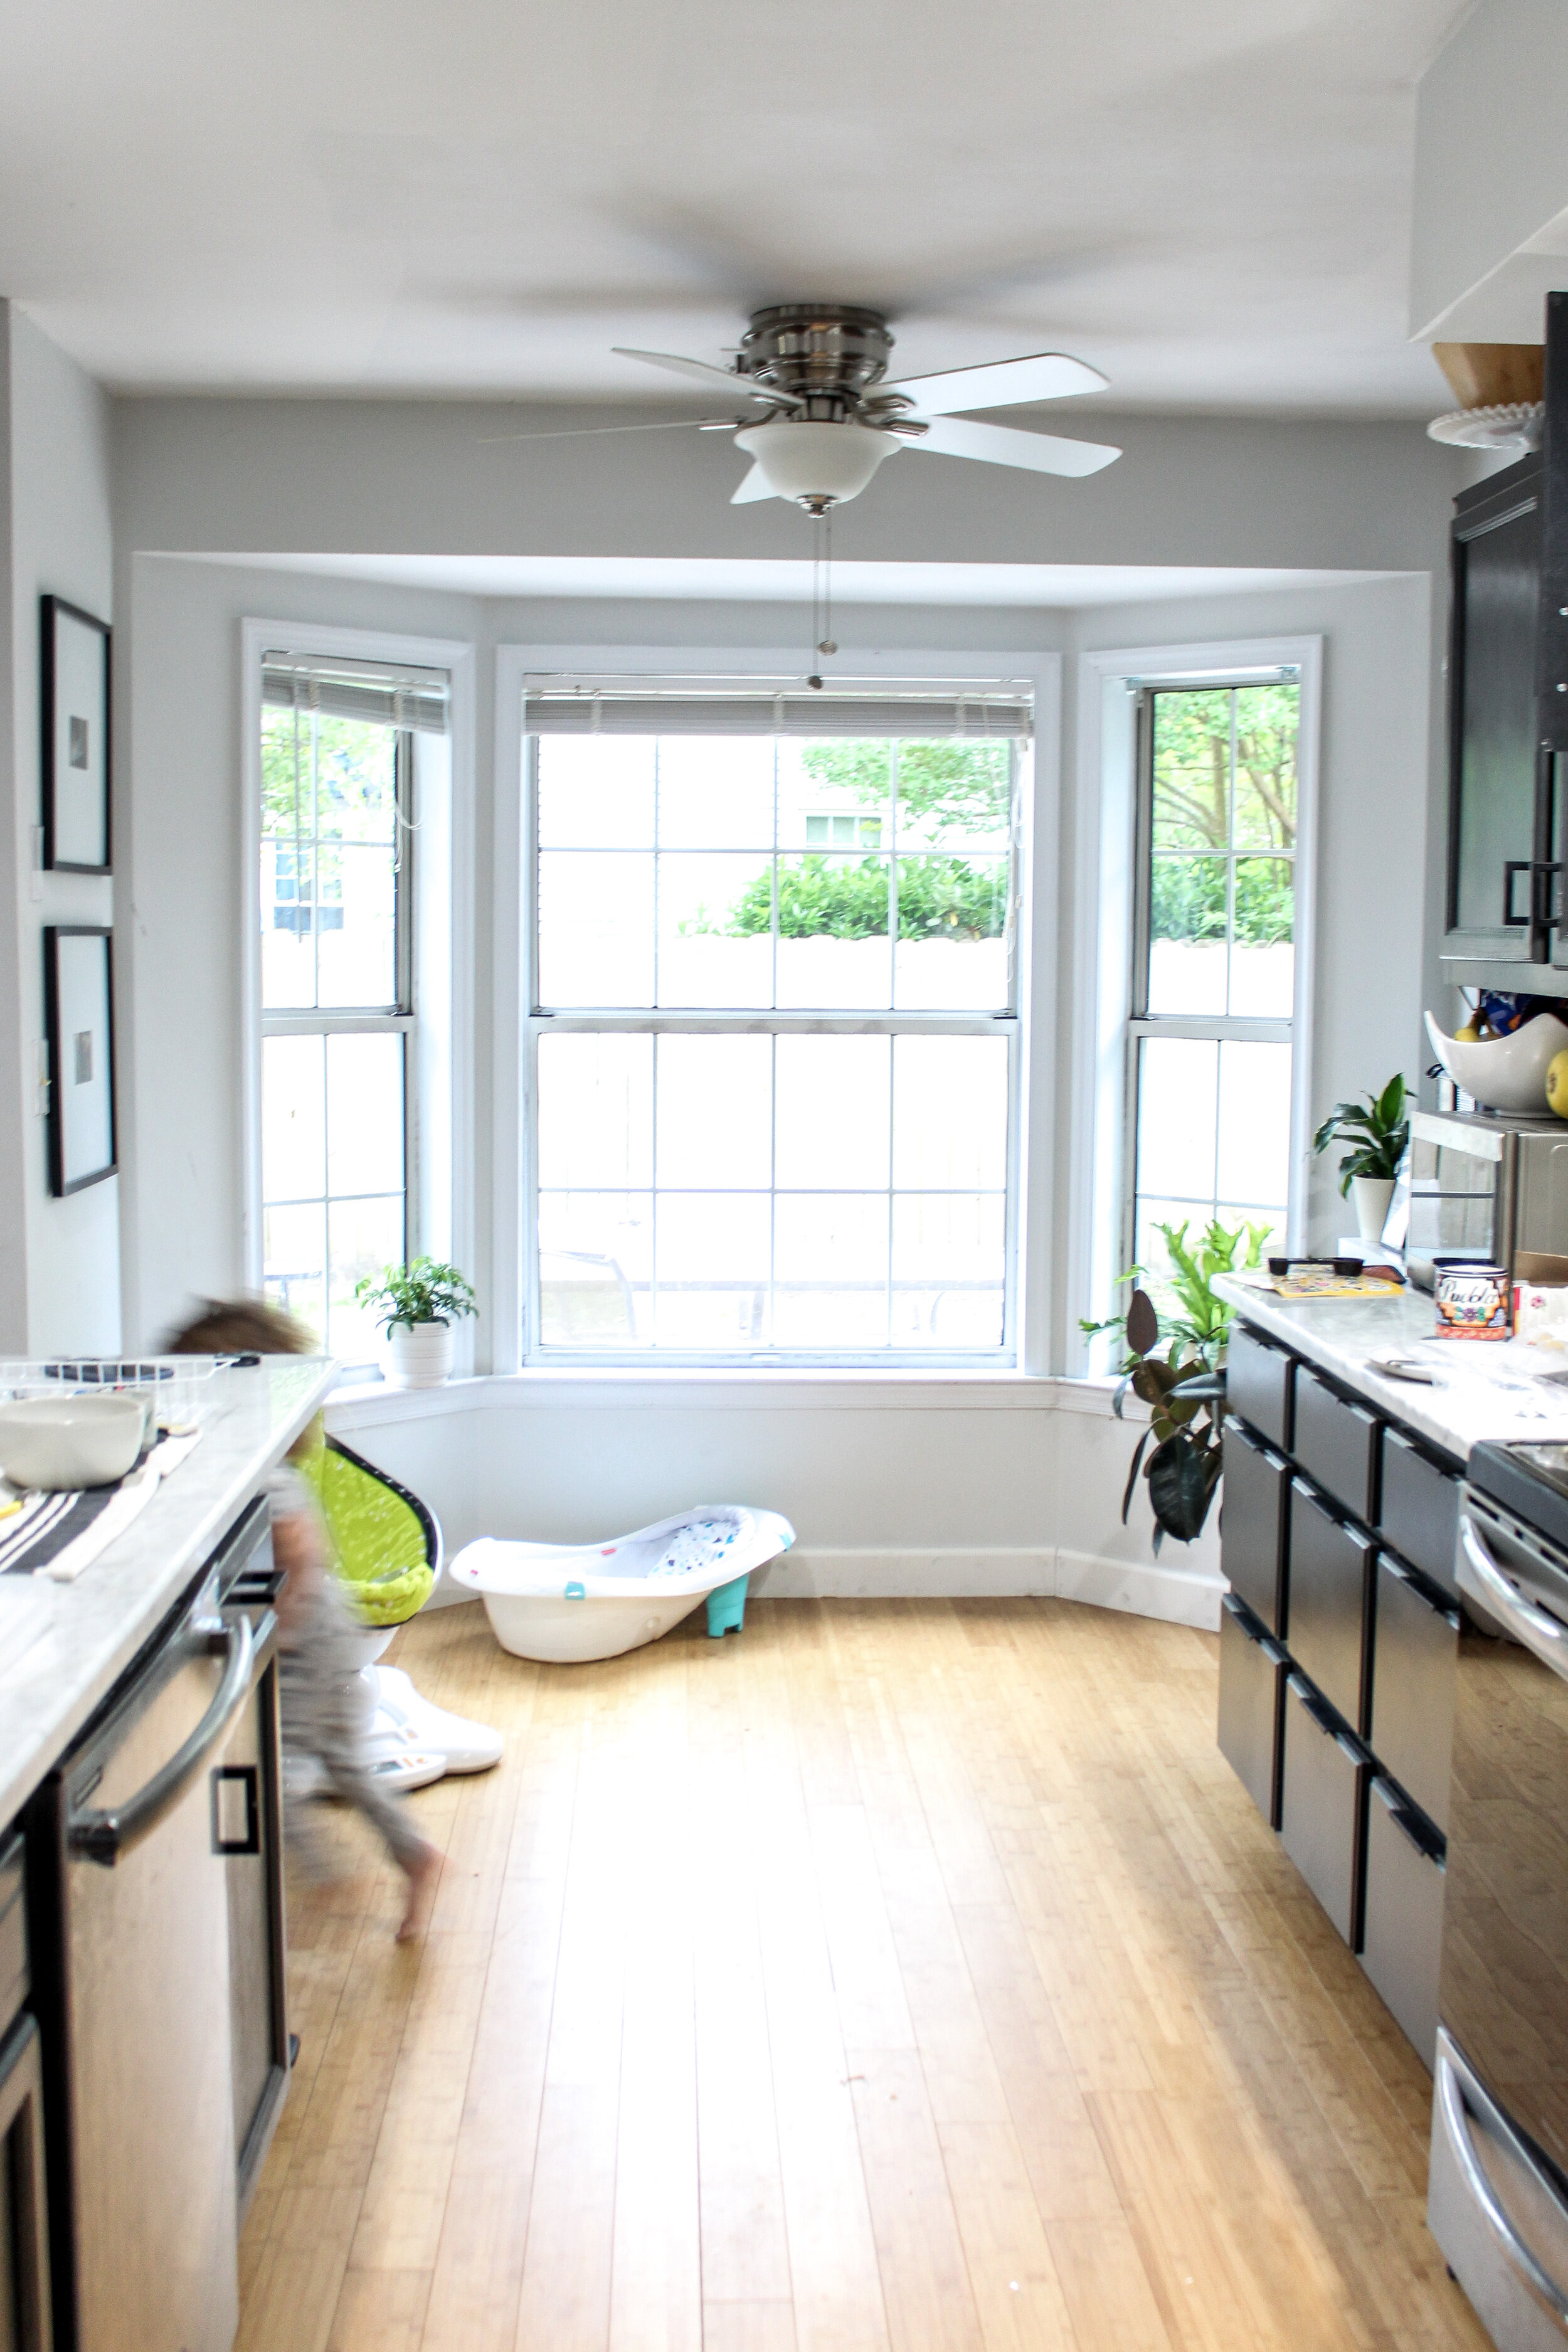
It finally arrived - the one week that Sean and the boys would dedicate to our Virginia Beach Home Base house. Sean had been promising me for several months that after one of our projects had finished up, he and the team would dedicate an entire week to our live-in flip renovation projects. We decided to tackle three different (and huge) projects in 5 days! One of them being our new DIY breakfast nook bench seat (click here for the final reveal) under the bay window at the end of our galley kitchen.

It’s important to note that at the start of this built-in seat, Sean wasn’t feeling the love. He had NEVER built a window seat let alone any type of built-in project in any of our houses. My response was, “ If these ladies on Instagram can use their power tools and build these things, so can you.” Maybe it made things worse, but at the end of the day, we have a gorgeous, well built, shiplapped, window seat!

Remember, Sean has zero woodworking experience and this first time project proved to not be as bad as he anticipated after all. It took three days with several breaks, two toddlers under toe, and a 6 week old project manager needing all things unrelated to the project at all times.
Materials:
2 x 4s
1 piece of sanded plywood for the top
screws and finishing nails
4-5 boards of shiplap
L Chanel trim piece
Wood Filler
Sand paper or sanding block
White Semi-gloss trim paint
Table Saw
Nail Gun
Caulk
Junction box (optional)
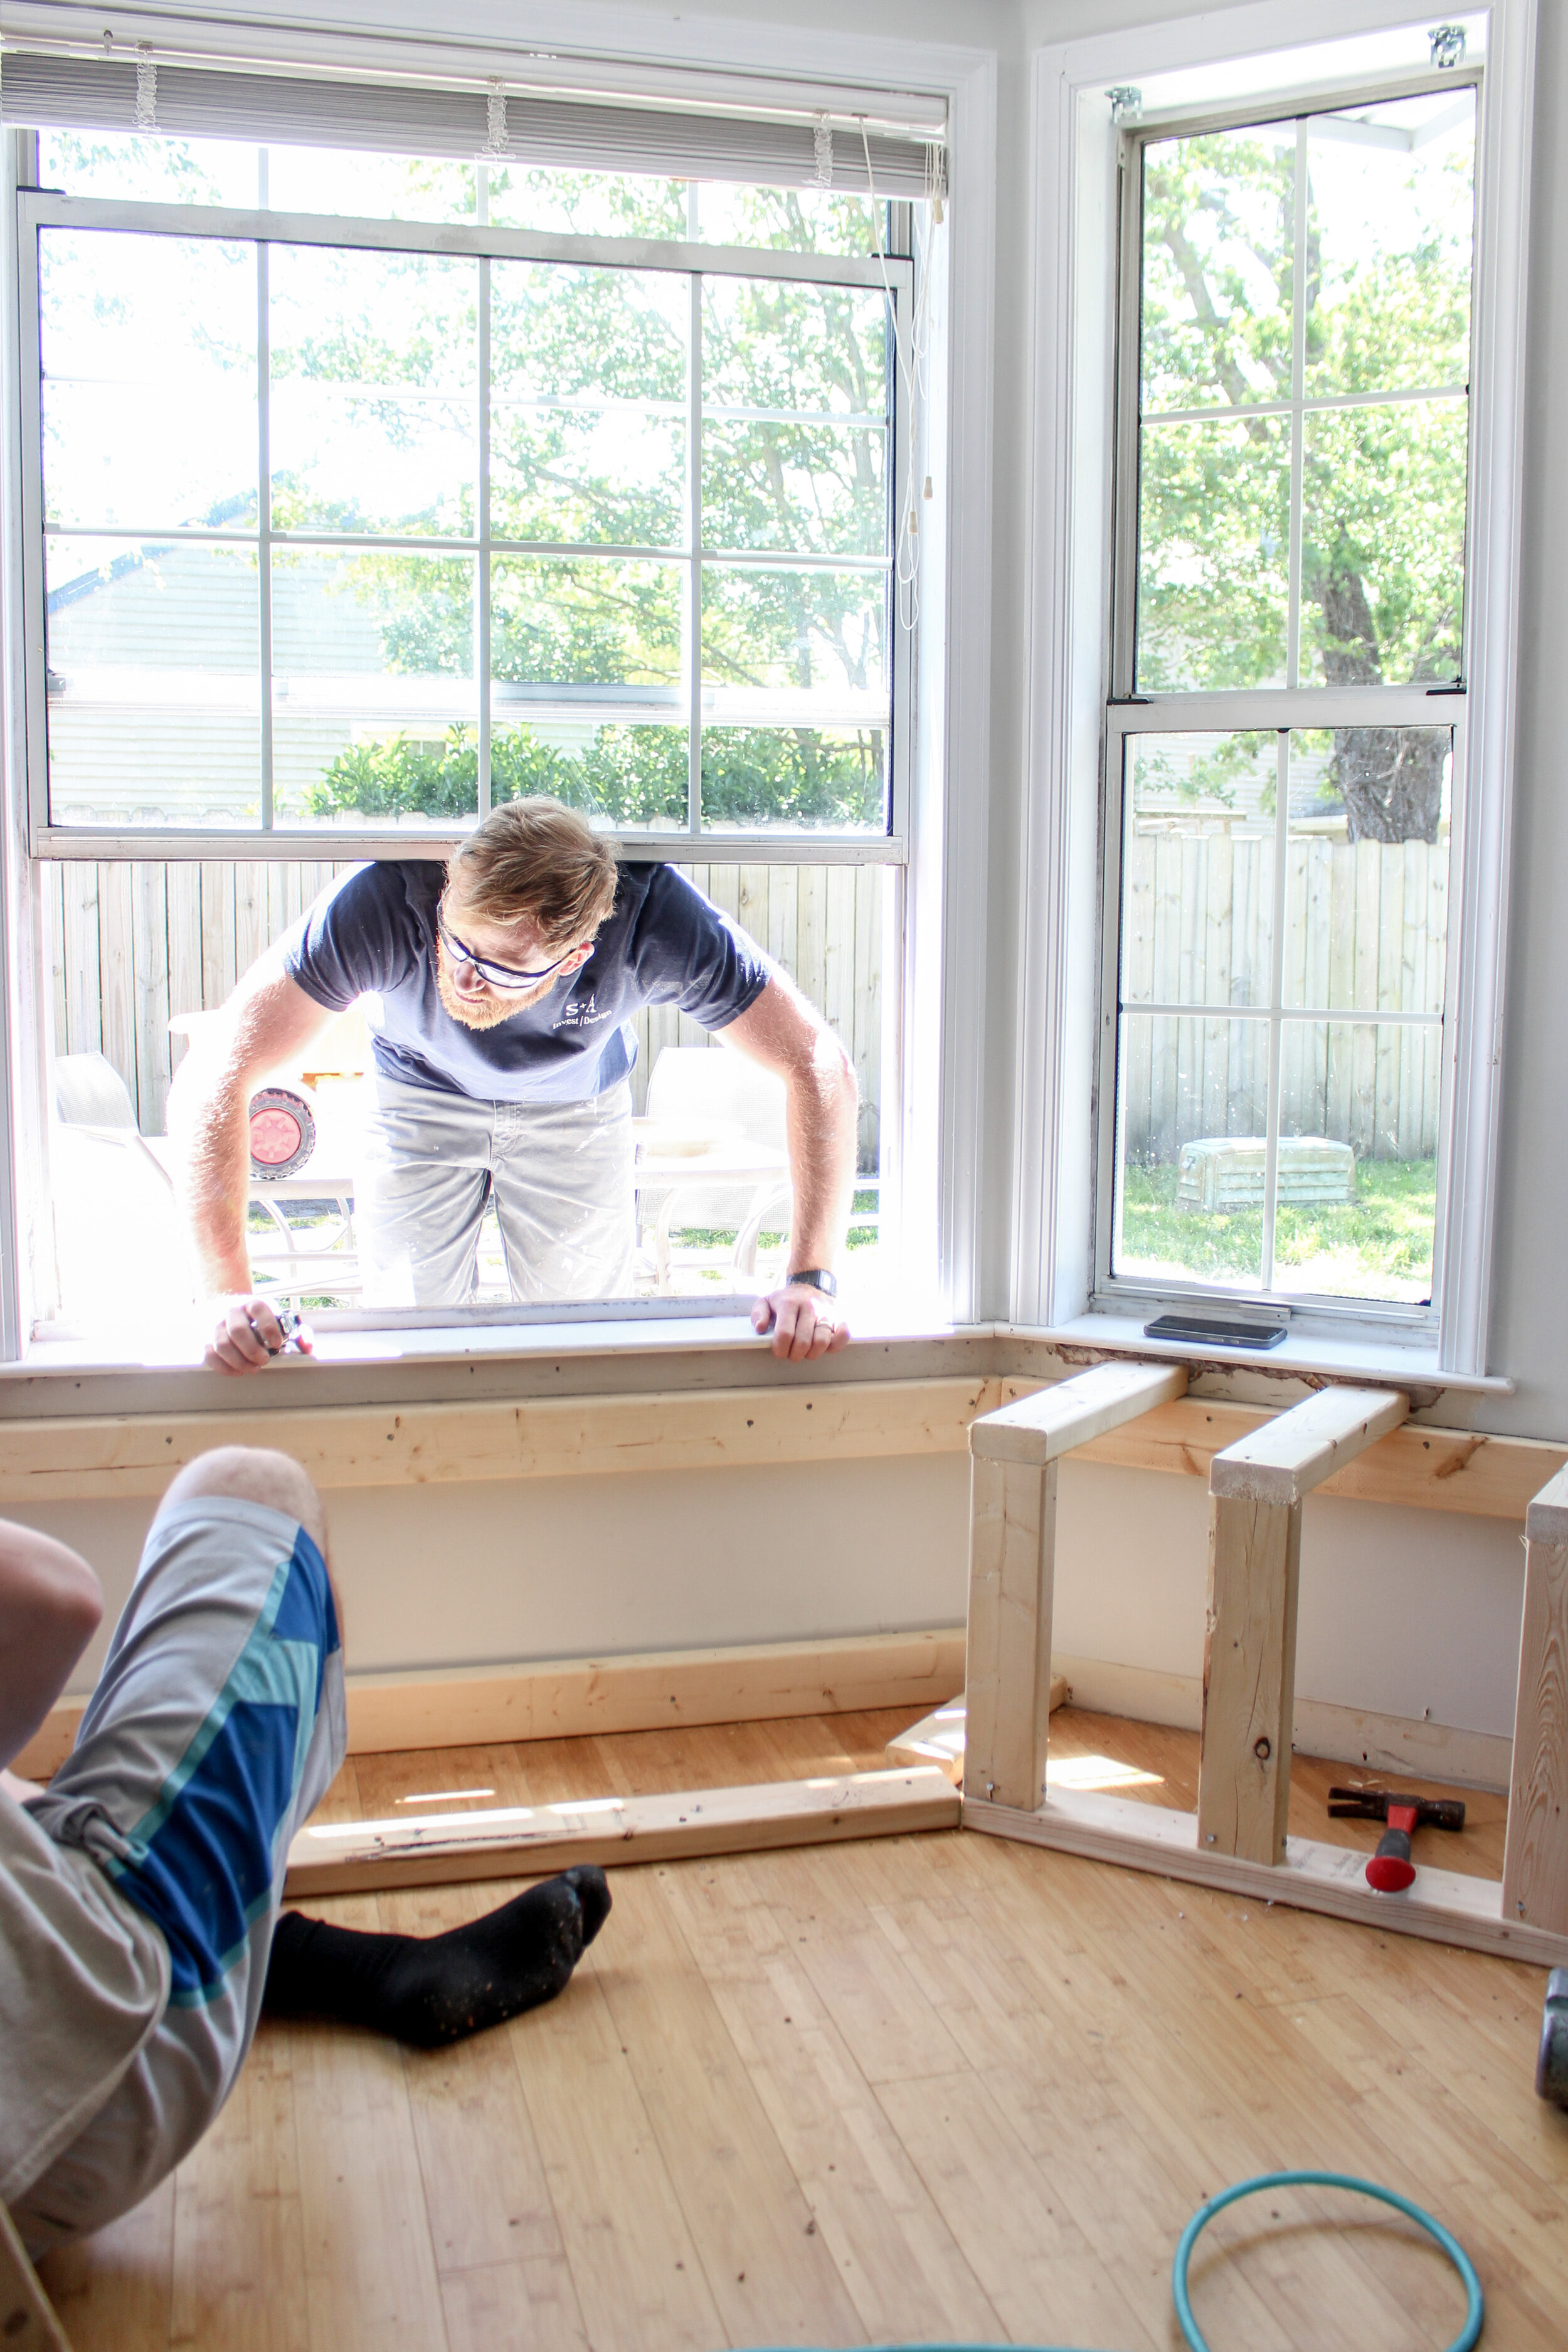
Step 1 - Build the base
Sean and our friend and employee Ryan started the base of the seat by measuring the space and building out 3 different “boxes” off the bay window. Each box was fastened to the wall by screwing five 2 x 4s into the wall - 3 for the top of the box that sat right below the window trim on all three sides. Two more boards ran down the wall at the end of the bay window to make the edges of the seat. These boards are the anchors. Because it’s a bay window with one straight window and two angled side windows, each “box” had to be built underneath each window. Taking the angles into consideration, they measured and cut approximately 9 boards per box and nailed them together under each window making sure to secure them to those first boards that were on the walls. Once an individual box was built, they attached the side boxes to the straight middle section with nails and screws where needed.

Step 2 - The Top
The top was definitely tricky. Because we didn’t have a digital angle finder, we needed to get creative to figure out how to get a piece of plywood cut in one piece with all the correct angles. The boys ended up using a large piece of card board and laid it on top of the bench. They measured and traced the angles and then laid the card board on top of the piece of plywood that would be used for the top of the seat and traced the drawing onto that board so that they could cut it exactly to fit on top of the bench.
Looking back, they said they would have built the box OFF of the wall so that they would have just flipped the box over on top of the play wood and cut it that way. The cardboard was used as the middle man in this project. The fear here is that somewhere in that transfer of angles and drawings, the angles wouldn’t match up perfectly and that was the case with us! The top fit almost perfect by, yes, we were slightly off on the sides. Keep reading to see how was fixed our angle problem.

Step 3 - Shiplap Sides
We thought we would need four boards of shiplap after measuring the bench seat but trial and error led us to a fifth board. Again, we didn’t have an angle finder so Sean, a second time, used trial and error to find the correct angles for each board of shiplap. This meant that a lot of scrap wood was created with “incorrectly” guessed angles. Ultimately the correct angles were found (via guessing and getting it right) and cut and the shiplap sides were created.

The boards were nailed with brad nails directly to the box sides. If you are looking to add storage to this bench seat, this is the step to consider adding cavities or hinges or whatever you need to create storage under the seat. We chose to leave it hollow for the sake of time.

Sean used his nail gun and a hammer to reinforce and attached the shiplap to the bench seat. Tip: try not to create too many nail holes because you will have to wood fill them later.

Step 4 - Add Electricity
This step was crucial for us. How many times will we sit at this seat doing work on the laptop or using our phones? Or how many times will I need to use a kitchen tool like a blender or hand mixer with the kids in this space and be in need of power? We had to pull our outlet off of the wall and make it usable on the side of the bench. Good thing Ryan, our team member, is an navy electrician ;)

Ryan and Sean brought the outlet out by using a junction box. This box allows for safe wiring extension from the old outlet that was on the wall to create the new outlet that was made directly in front of it. Make sure you have an electrician to help you when dealing with electricity!

Step 5 - Wood Filling
Remember how I said be careful because you will have to fill in those nail and screw holes? Well, it’s time. And even though I’m a nube at power tools and rarely use them myself, wood filling is something I can do confidently.

As you can see in the picture above, we had larger gaps along the sides of the bench that met the wall so we needed heavy wood filler in those places as well as the nail and screw holes. All these areas needed a few coats of filler and sanding down (about 3 times).

Here’s another wood filler tip: Don’t use too much wood filler on the holes because sanding is annoying and messy so add a thin layer over the holes and sand down. If you need to do it twice, that’s better than having to use elbow grease to sand done a glob of dried filler.

Step 6 - L Channel Trim piece installation
So here is where we corrected those nasty angle issues. The top didn’t line up perfectly to the base. The angles had some slight imperfections and ultimately the seat needed some kind of cap or trim piece to clean up the look. Sean is so quick on his feet and thought of using an L channel for the top of the bench to cover where the plywood met the sides of the box.

He attached the L channel with more brad nails and then used caulk to fill in the gaps. Caulk is vital (you hear me, moms!) because you don’t want crumbs and food getting into those pesky cracks.

Caulk also helps to make the bench look cleaner and you can always paint overtop of it for a cohesive look.
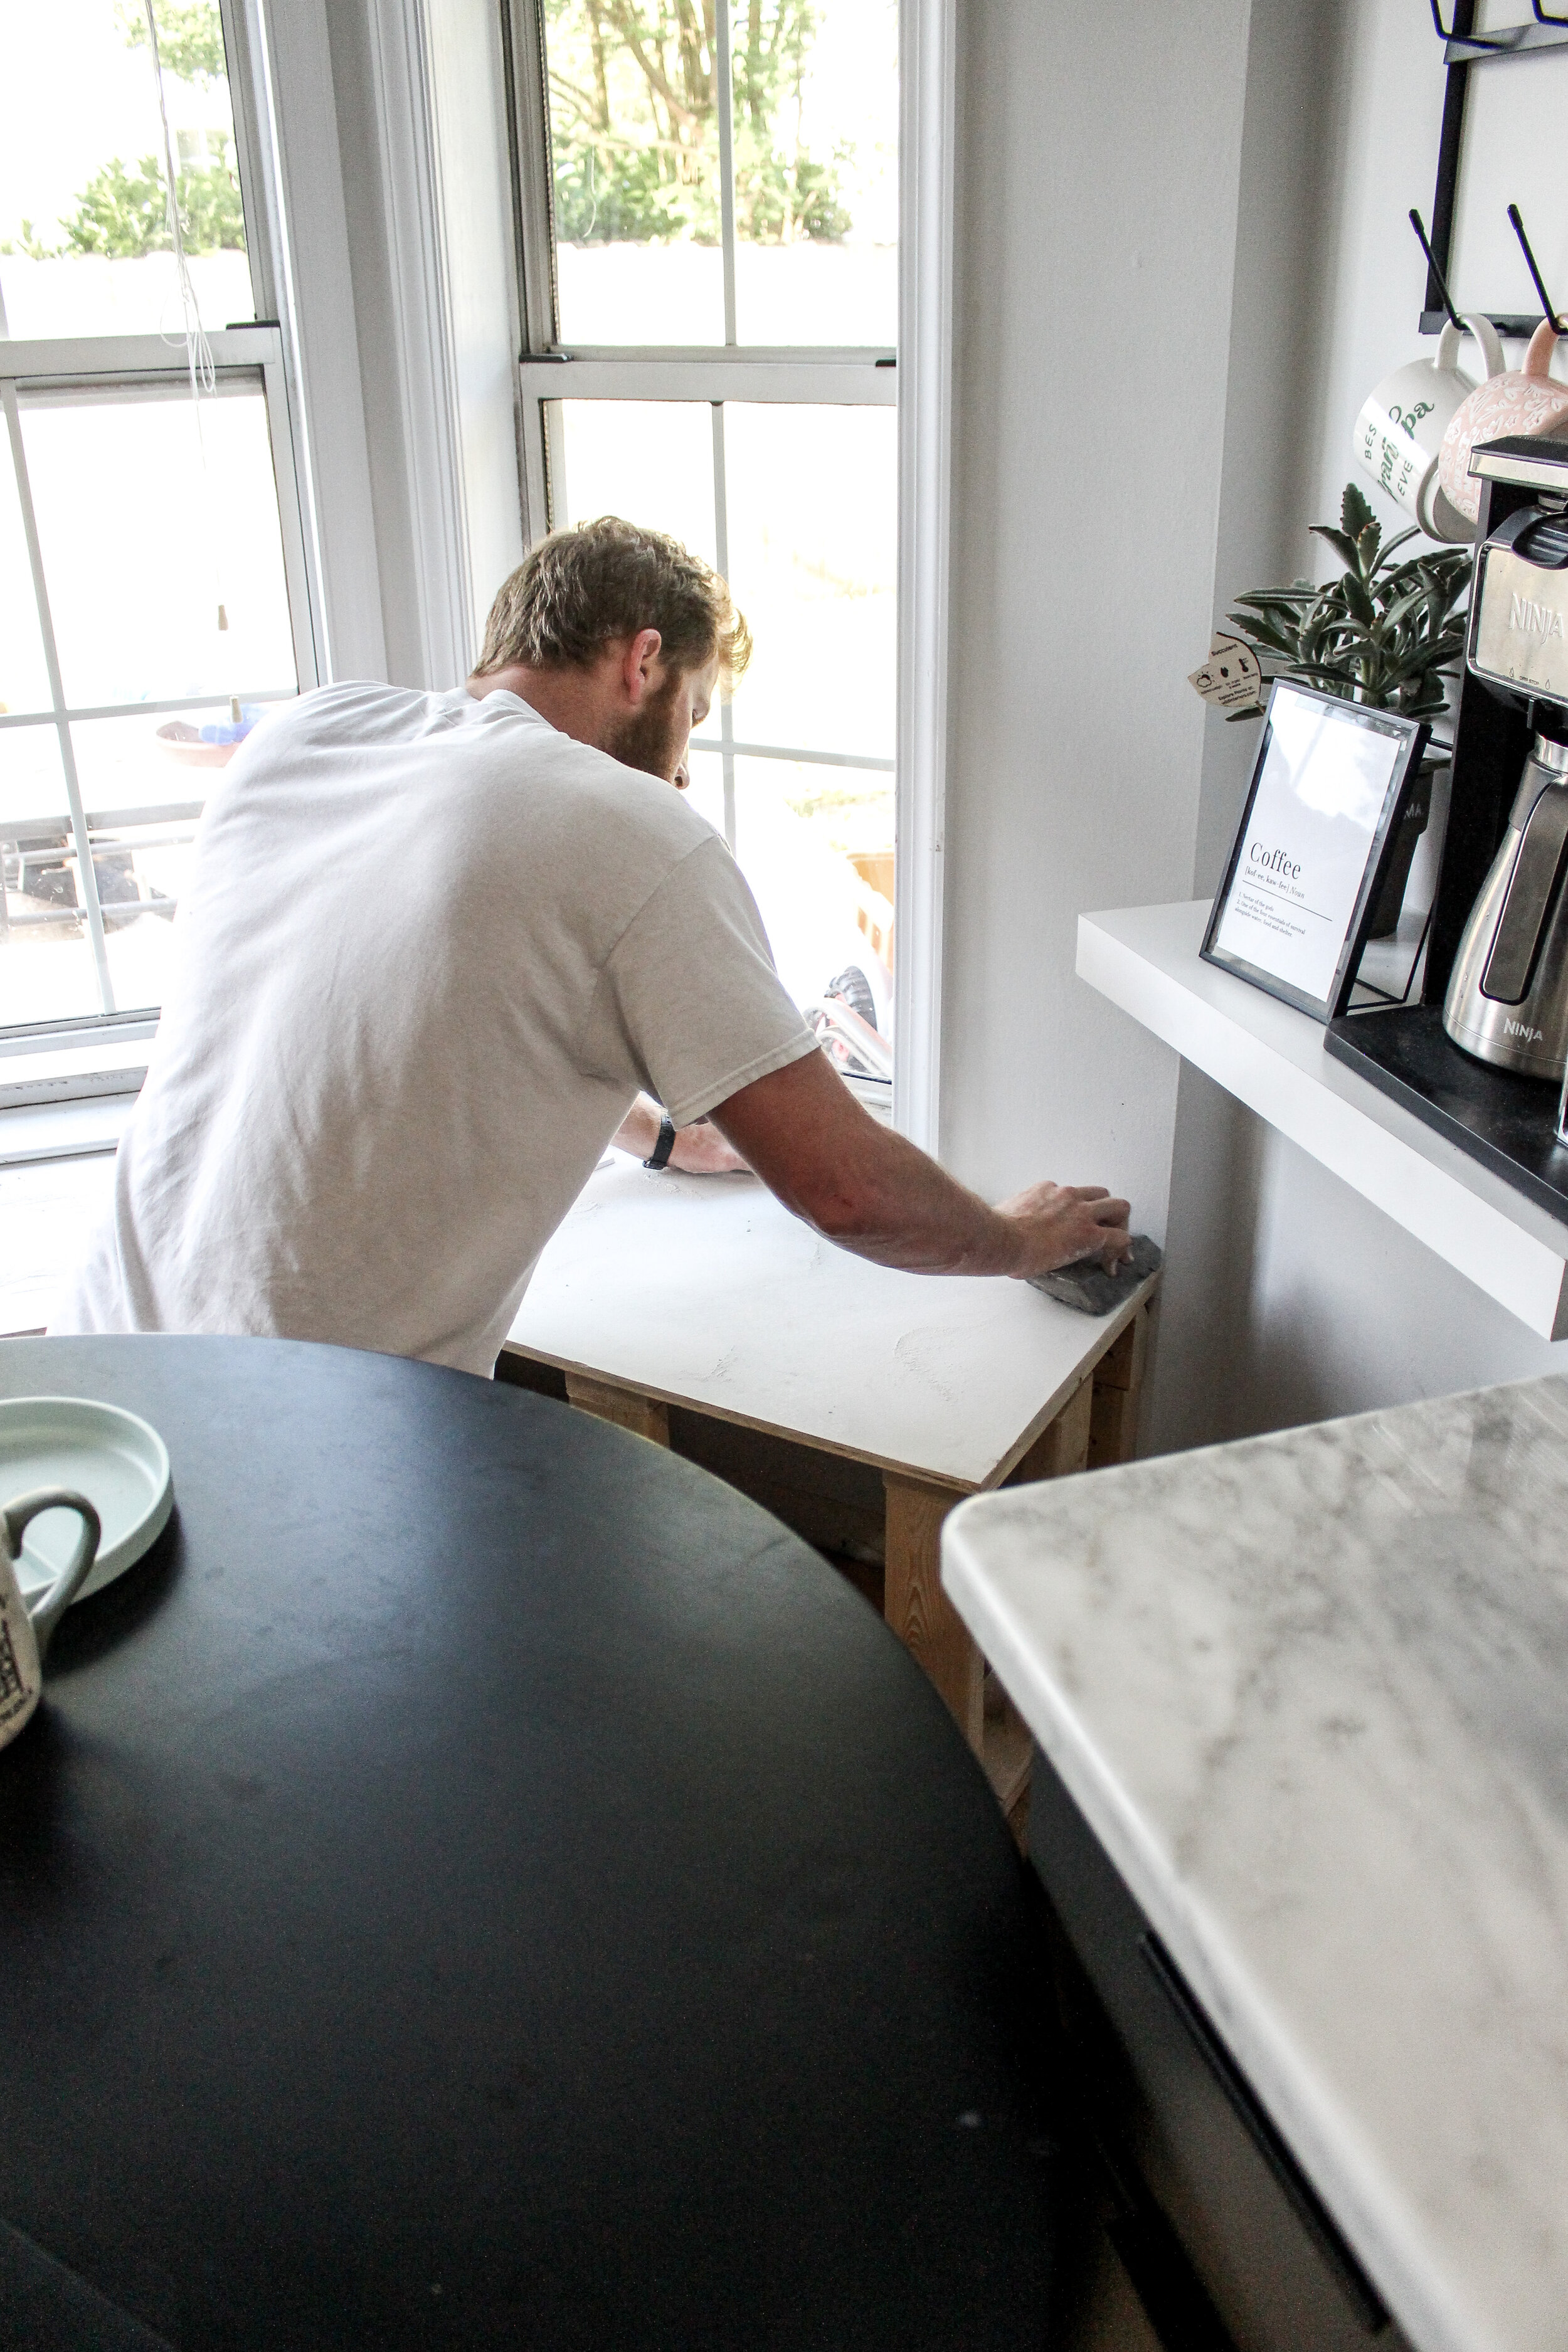
Step 7: Sanding
Use a hand sander next or a block sander and make sure to sand down the entire bench, working on those nail and screw holes specifically. A drop cloth will help with the mess (another thing I wish we used in retrospect!).

Step 8: Painting
We chose to used semi-gloss trim paint because I wanted the seat to clean and wipe off easily. Be sure to use semi gloss or polyurethane to finish your piece if you do not chose white trim paint. We used a roller and a paint brush to cut in and hit those little wood filled holes.

By the end of the project, Sean took a step back and definitely felt different about the project as a whole. This bench seat has made my husband feel so incredibly proud. He definitely wasn’t sure about it at first but with the right kind of coaxing and encouragement (ehem…) he is so incredibly happy it’s done.
Click Here to see the final reveal! I talk a little more in that post about the design and thought process behind the bench. I have bamboo shades coming from Select Blinds in a few days and I will be taking lots of final pictures when they are installed! Project one of three was finally completed and I will be updating you on our other two projects that we worked on this week (laundry room and master bathroom) coming soon. Thanks for hanging out with us and find me on IG for any questions or more inspiration. Final Breakfast Nook Bench Seat Reveal!
Ann | DESIGN